Managing Your Linux Server with Webmin
Managing Linux servers can be very difficult at times. It can be very hard for someone who doesn’t have a lot of experience with the command-line tools. In addition, it’s also difficult for administrators to manage their servers while on the go. Logging in from a terminal emulator on a mobile device isn’t the most comfortable way to work. This is where control panels such as Webmin come in. Webmin is a web-based control panel for Linux systems. It provides an intuitive, easy-to-use interface for managing your server.
In this article, we’ll learn how to install and configure Webmin for your Linux server. We’ll also see how to use Webmin for the most common use cases.
Installing Webmin
First, we’ll begin by installing Webmin. Depending on the distribution you’re running, you will have to use different commands. In this article, we’ve given instructions for the most commonly used systems.
For Ubuntu/Debian (and derivatives)
The Webmin project provides a repository for Debian-based systems. You need to add it to apt’s list before you can use it.
echo "deb http://download.webmin.com/download/repository sarge contrib" | sudo tee /etc/apt/sources.list.d/webmin.listNext, we need to add the Jamie Cameron’s PGP key so that apt can verify the packages.
wget -qO - http://www.webmin.com/jcameron-key.asc | sudo apt-key add -Then, you can install Webmin with apt:
sudo apt update
sudo apt install webmin
For RHEL/CentOS
If you’re on RHEL/CentOS, the Webmin project provides a repository, which you should add to yum’s list of repositories like so:
cat << EOM | sudo tee /etc/yum.repos.d/webmin.repo
[Webmin]
name=Webmin Distribution Neutral
baseurl=http://download.webmin.com/download/yum
enabled=1
gpgcheck=1
gpgkey=http://www.webmin.com/jcameron-key.asc
EOM
Then, you can install Webmin with yum, just like we would have done for any other package:
sudo yum install webminPost installation
At this point, Webmin has been successfully installed on your system. You can access it by viewing https://<your_server_ip>:10000/ from your browser. If you’re having problems, you should check whether you’ve blocked this port, or if another software is running on the same port.
After you have entered the above URL in your browser, you will get an error stating that the certificate is self-signed. This is normal, and you can trust the certificate and proceed. Later on, you can configure Webmin to use a custom certificate that you’ve obtained from a certificate authority. (This is discussed later in this guide.)
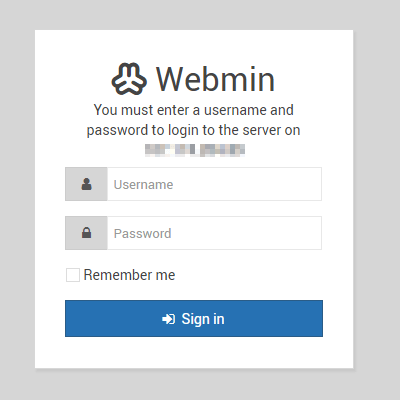
After you’ve trusted the certificate, you will be taken to the login screen. Here, you can log in with the same username and password you use on your Linux system. You can either log in as root, or use another user who is allowed to use sudo.
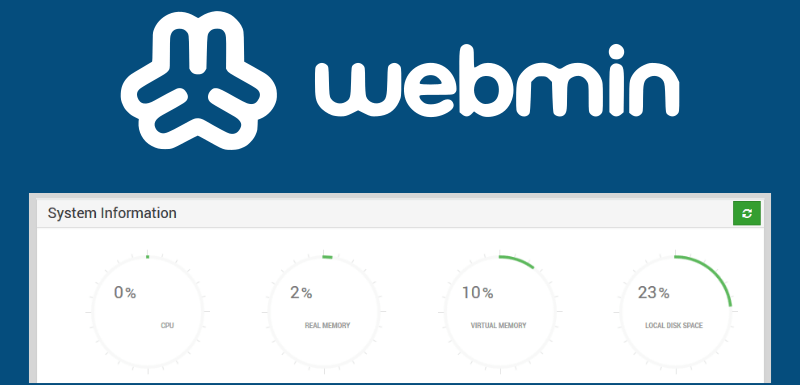
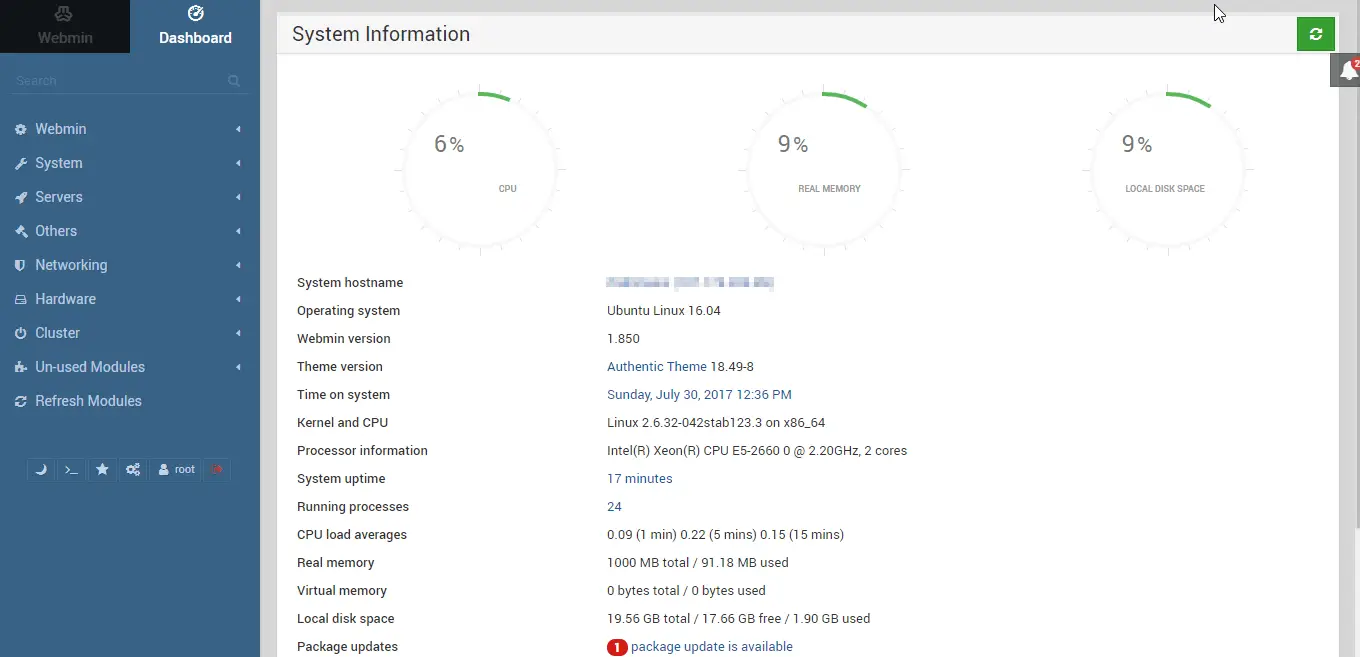
Next, you will be taken to the dashboard. This page displays general system information, and you can control various aspects of your server from the various sections on the right.
In the next section, we’ll look at some of the functionality Webmin provides.
Some commonly used Webmin modules
Webmin provides a plethora of functionality in the form of modules. There are modules to manage every aspect of a Linux system — whether it’s updating packages, configuring your firewall or managing log rotation. However, we’re going to only scratch the surface in this guide. We’ll look at some commonly used modules which will help you get started with your Linux server. Some modules, such as those for managing a DNS server are disabled until you install the appropriate software.
Managing packages
You can install and uninstall packages very easily from Webmin. From the left column, select System → Software packages. This will take you to a page that looks like the one below. The exact details shown here may vary, depending on the distribution you’re running Webmin on.
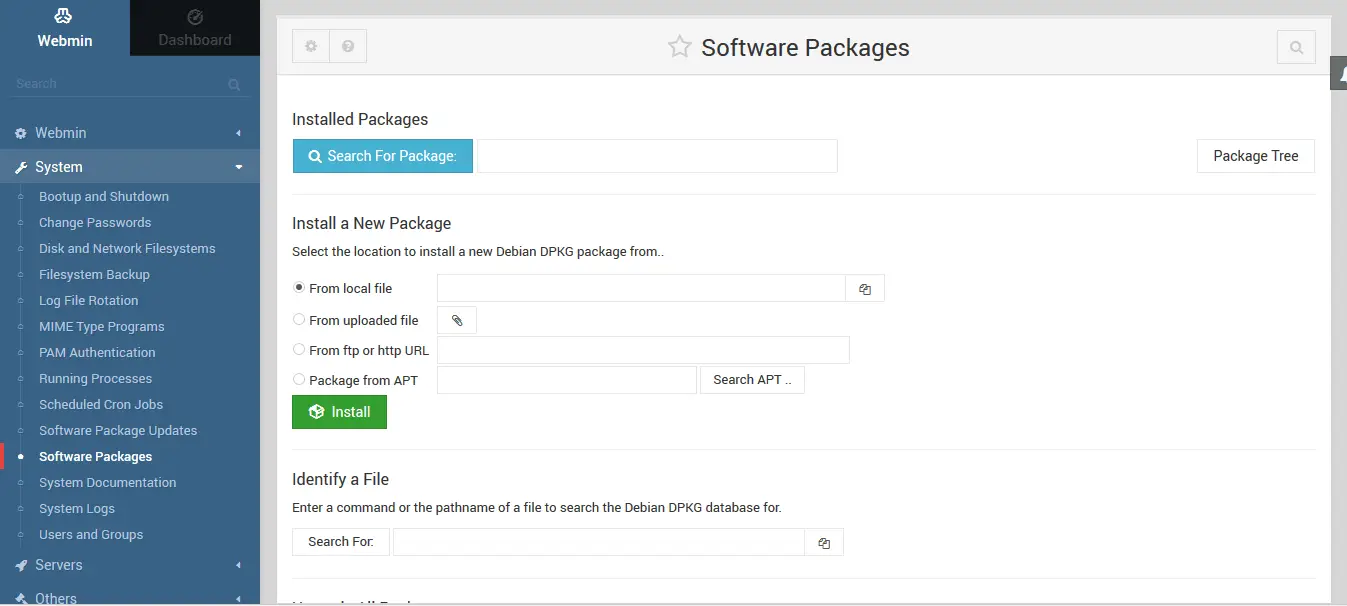
Here, you can search for a package installed on your system, in order to view more information about it or to uninstall it. Also, you can install a package using apt or from a local or remote package file.
Updating packages is quite easy too. If software updates are available, you can click on the “package update is available” notification on the dashboard. This will take you to the “Software Package Updates” page. Alternatively, you can also go to this page by clicking on System → Software Package Updates from the menu on the left.
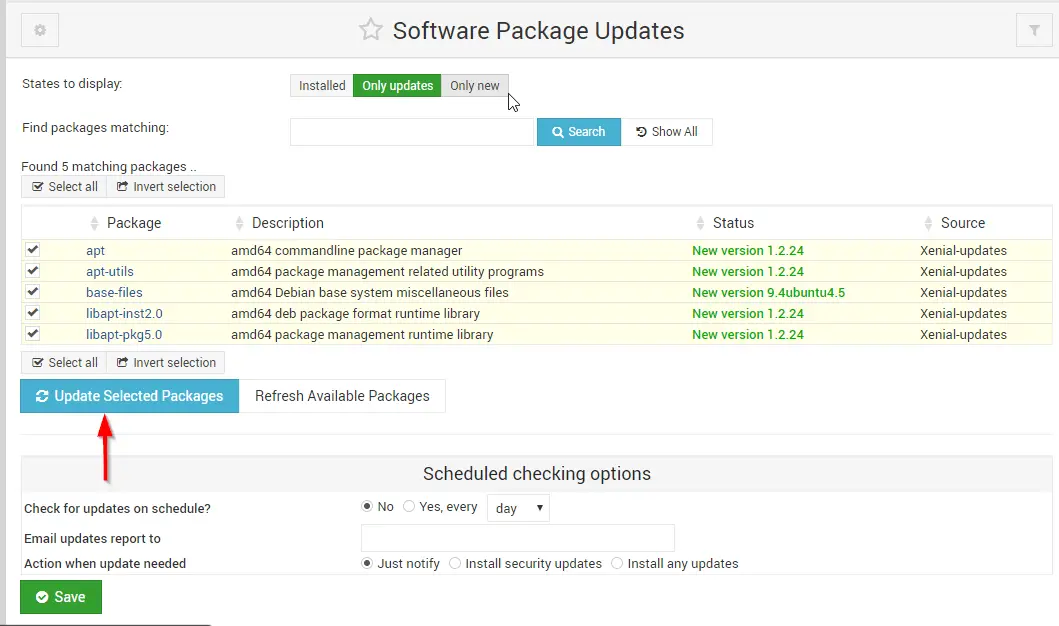
Here, you can select the individual packages you want to update, and select “Update Selected Packages” as shown. You can also configure automatic updates from the “Scheduled checking options” on this page.
Managing users
You can add or delete users from your system very easily with the user configuration option. From the menu on the left, select Webmin → Webmin Users. To add users, click on “Create a new Webmin user” as shown in the image below.
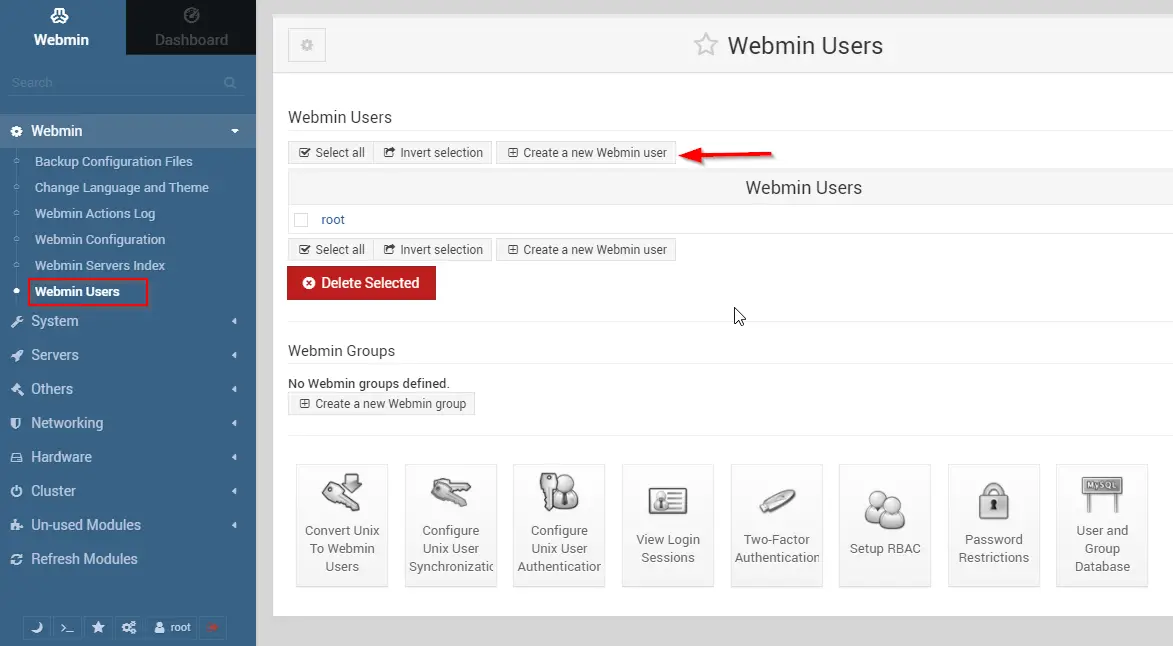
If you want to remove an user, you should first select the user by clicking on the checkbox and then delete them with the “Delete Selected” button.
File manager
If you want to browse or upload files installed on a remote system, you generally have to use SFTP or rsync. However, these tools aren’t available everywhere. Webmin provides a simple web based file manager, through which you can browse, upload and download files. To open the file manager, select Others → File Manager from the main menu.
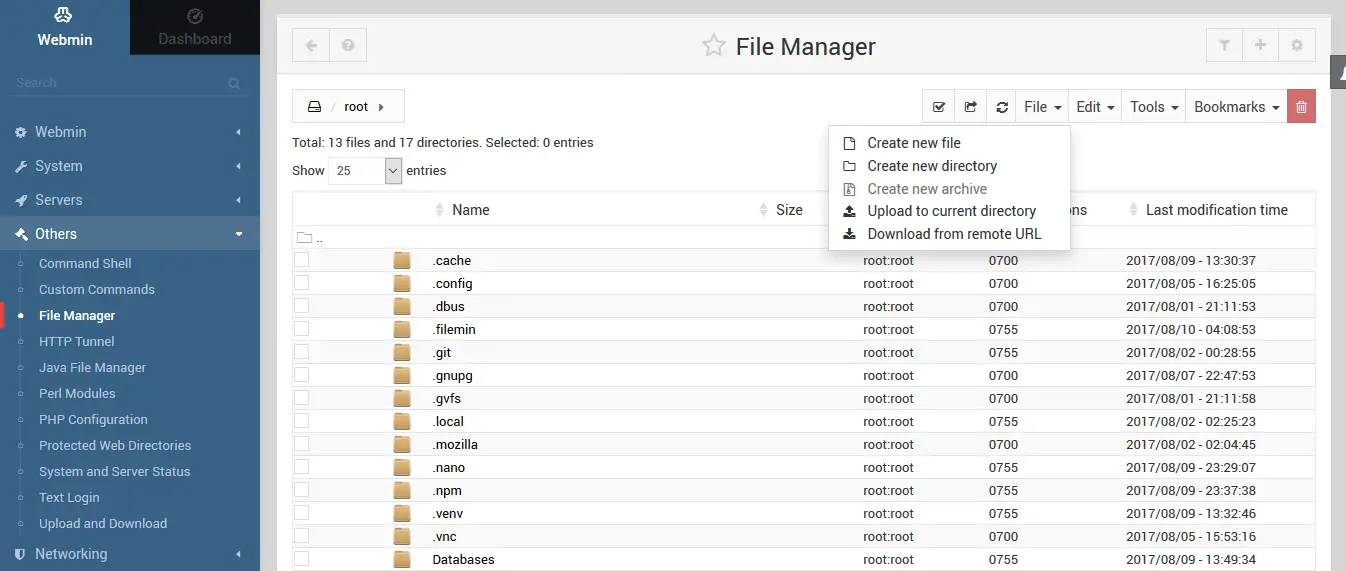
To create a new file or to upload a file, you can use the “File” menu on the top right. You can also perform advanced tasks like changing file permissions from the “Tools” menu.
Working with the command line
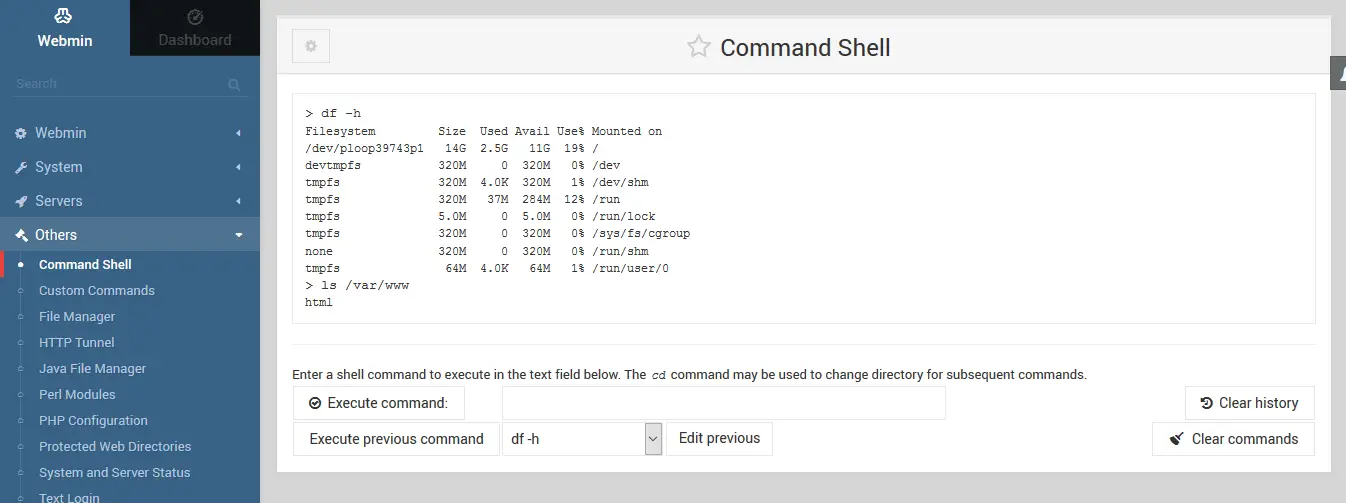
Although Webmin has a lot of modules, you may sometimes need to fall back to the command line for some tasks. For these situations, Webmin also provides a command-line shell. You can open this from Others → Command Shell. This command line isn’t a full fledged web based terminal emulator, so, interactive programs may fail to run. However, it’s good enough for some quick command-line based tasks.
Configuring Webmin
Webmin offers a wide variety of configuration options. To access these options, click on Webmin → Webmin Configuration from the menu on the left.
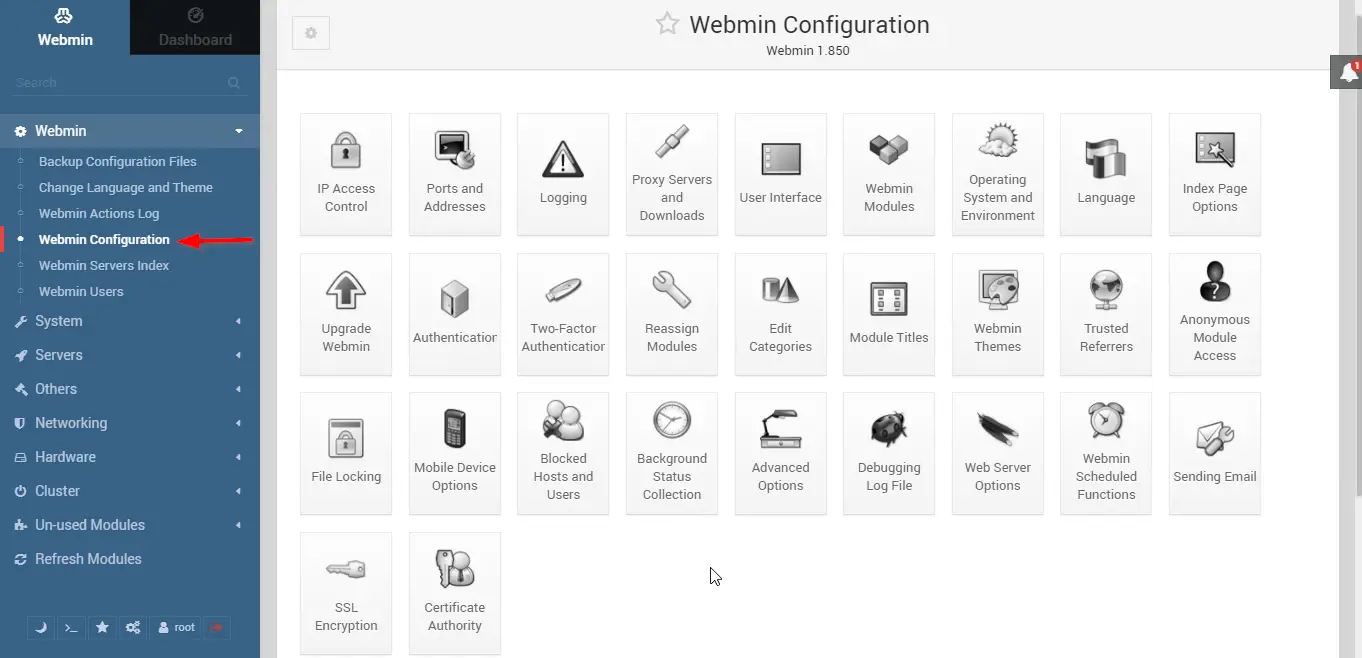
On this page, you’ll find a huge number of options you can configure, ranging from security to theming. Again, for the purposes of this guide, we’ll restrict ourselves to discussing a few of the most important ones.
Keeping attackers out
Anything that’s exposed to the internet is bound to attract the attention of hackers, sooner or later. An attacker can try to get into your server by trying out many different usernames and passwords. Fortunately, Webmin comes with built-in tools to prevent this from happening.
If you want to allow or block certain IPs Webmin, you can use the “IP Access Manager”. Depending on whether you want to block or allow IPs, select “Only allow from listed addresses” or “Deny from listed addresses”. Next, in the “Allowed IP address” box, enter the IPs you want to block or allow. 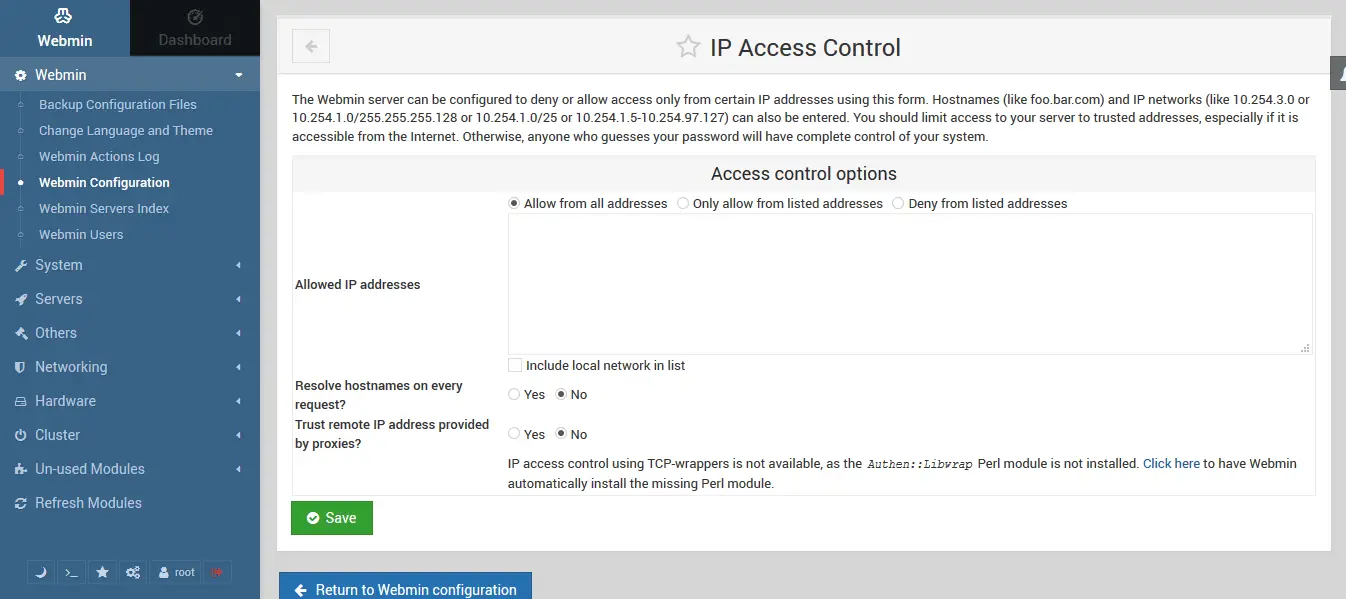
Unfortunately, it isn’t always feasible to use IP based rules. Again, Webmin has options to block IPs with too many failed logins. You can configure these options on the “Authenticator” page. The default is to block IP addresses with 5 failed logins for a minute, but you can increase it to something more effective — such as a 12 hour block (43200 seconds) on 25 failed logins. You can also block an user the same way, by enabling the “Block users with more than…” check box.
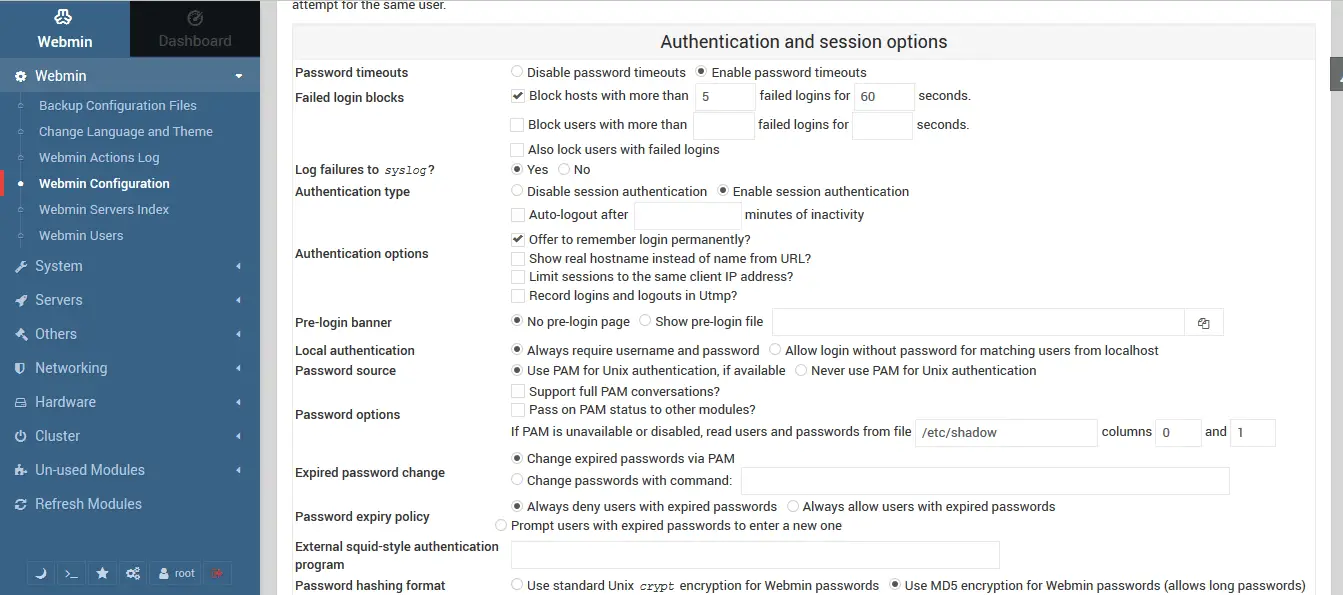
If you’re looking for even better security, you can also configure two-factor authentication from the configuration page.
Configuring SSL certificates
As we’ve discussed previously, Webmin uses an auto-generated, self-signed certificate by default. If you’d like to configure Webmin to use a different certificate, head over to the “SSL configuration” section. Here, you can upload your own certificate from the “Upload certificate” tab.
You can also get an SSL certificate from Let’s Encrypt, which is an automated certification authority. It should be noted that you need a hostname to use Let’s Encrypt. In addition, you should also install Apache or another web server. On Debian/Ubuntu, you should install the apache2 package, whereas on CentOS/RHEL you should install the httpd package.
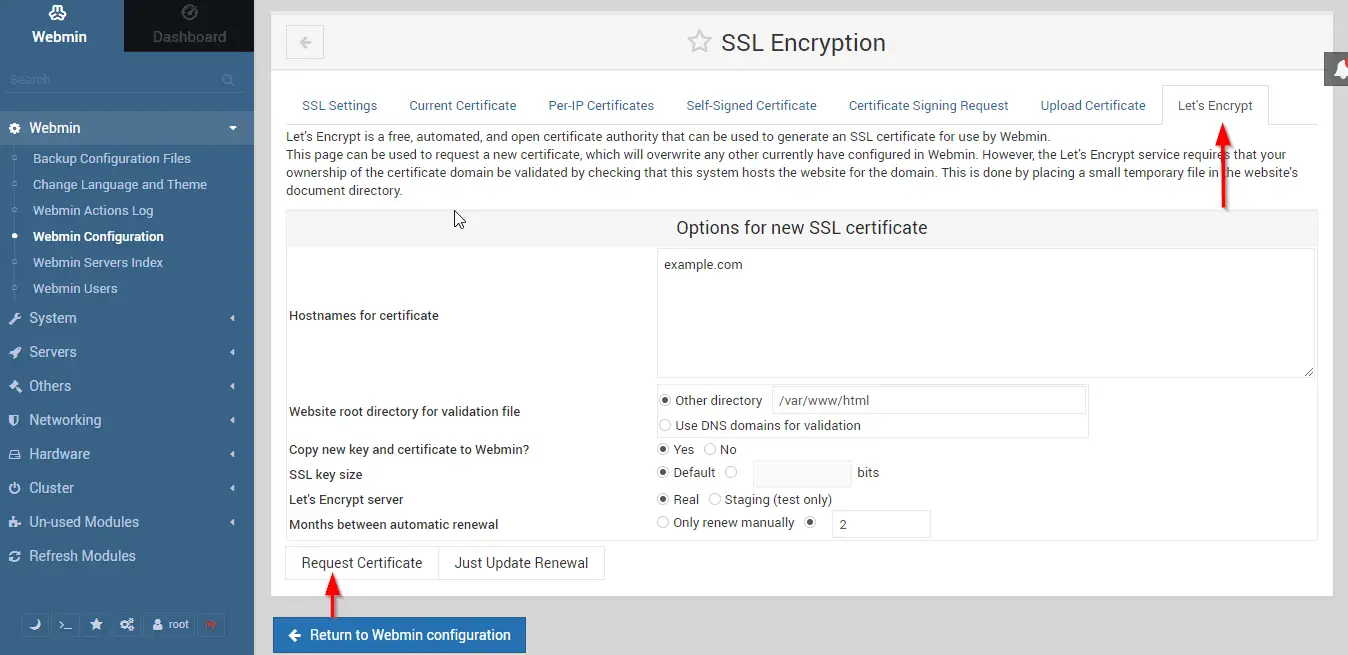
Once you’ve installed the web server, fill in the hostname field. In the “Website root directory” section, select “Other directory” and type in /var/www/html. If you’re already using another web server, you should use the web directory that you’ve configured. Then, set “Months between automatic renewal” to 1 or 2 since Let’s Encrypt certificates are only valid for 3 months. Next, click on “Request Certificate” and it should be issued in a few seconds.
Conclusion
Webmin is one of the best tools for managing your Linux servers. It provides a wide array of useful functionality that both novice and power users will appreciate.