How to Access Your Mac over SSH with Remote Login

Remote Login is a feature in macOS that allows you to connect to your Mac from another computer. Enabling this feature starts up a SSH server, and it allows you to access your Mac through a command line interface and transfer files.
SSH is an encrypted and authenticated protocol. Therefore, it protects you against man-in-the-middle attacks, unlike traditionally used protocols such as telnet and FTP.
In this article, we’re going to take a look at how to enable Remote Login and use SSH to manage your Mac and transfer files.
Enabling Remote Login
Enabling Remote Login is quite easy. You simply need to:
- Open “System Preferences” from the Apple menu and click on “Sharing”.
- Then, enable Remote Login by clicking on the checkbox.
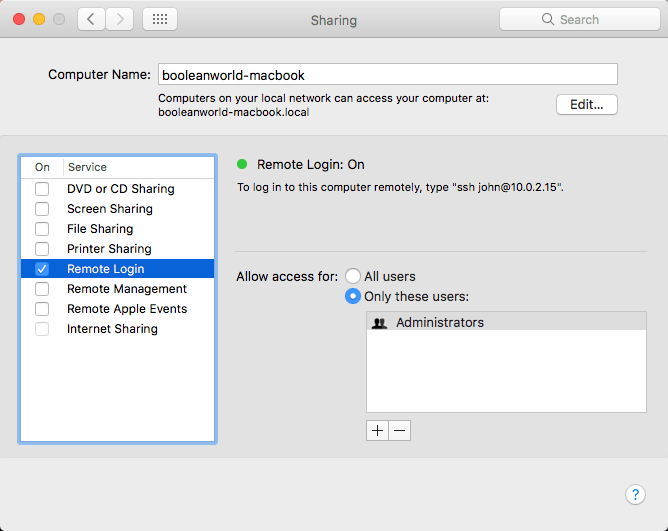
As soon as you click on the checkbox, the SSH server is started in the background.
If you want to restrict SSH logins to certain users or groups of users, select “Only these users” and add some users to the list. Otherwise, you can select “All users”.
Now, you might want to verify whether the SSH server working as intended. Open a Terminal window and type in:
ssh <your_username>@localhostThis command will show you the server key and ask you to accept it. Type in “yes” to verify, and then type in your password. You’ll now be logged in to your Mac over SSH. Now, you can execute various commands. For example, in the screenshot below we’ve run a few commands:
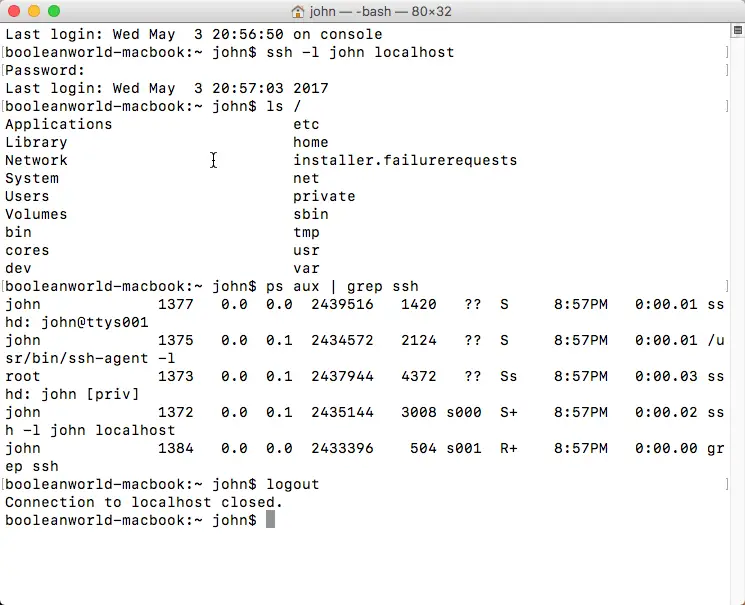
Since we now know that everything is working, type in “logout” and hit Enter.
Connecting to your Mac remotely
In order to connect to your Mac from a remote computer, you should first know its IP address. Fortunately, you can find it in the “Sharing” settings window. However, if your Mac is behind a router, you’ll see a local IP address like “10.0.2.15” and while you can still SSH into your computer from any other device on the same network, you can’t access it from the internet. You’ll need to configure port forwarding on your router so that any inbound traffic on port 22 is sent to your Mac.
After enabling Remote Login and configuring your network (if needed), you can now connect to your Mac from another computer over SSH.
On Linux, macOS or an Unix variant, you can fire up a terminal window and type in:
ssh <your_username>@<your_mac's_ip_address>If you’re using Bash on Windows, open the “Bash on Ubuntu on Windows” shortcut to get a bash shell and type the above command there. Cygwin and MSYS2 also have the OpenSSH package in their repositories and you can connect with the same command in their shells.
If you aren’t using Bash on Windows, you can use PuTTY to connect to your Mac.
If you’re on a mobile device, check out Termius, ConnectBot and JuiceSSH.
Transferring files remotely
SSH allows you to transfer files with methods such as SFTP, rsync and SCP. In this section, we’re going to take a look at using the first two protocols to transfer files.
SFTP
When it comes to SFTP, there are a variety of clients you can use. There’s the command-line based sftp program, as well as GUI based clients such as Cyberduck(macOS) and WinSCP(Windows). For example, if you’re using Cyberduck, select SFTP from the dropdown and fill in the server details: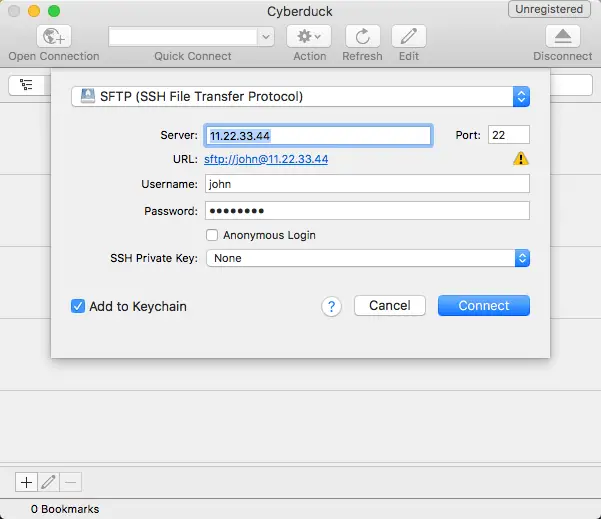
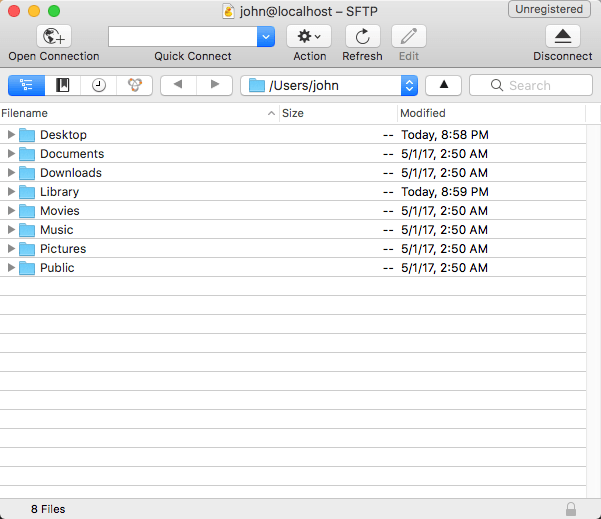
Next, click on “Connect”. Cyberduck will log in and show you a list of files. Now, you can modify, remove, upload and download files from your Mac.
rsync
Another way to transfer files is rsync. It has the same semantics of cp. Let us assume that you’re the user john and your Mac is located at 11.22.33.44. Say, you want to copy a file named “report.txt” in your home folder onto the current computer you’re working on. You can do it with:
rsync -v [email protected]:~/report.txt ./The -v flag is to enable verbose logging, and it is useful to see the percentage, speed and the list of files transferred.
If you want to transfer a directory on your current computer to the home folder on your Mac, you can run:
rsync -rv ~/Movies [email protected]:~Just like cp, the -r flag allows you to copy directories.
rsync has a lot of options, such as preserving file permissions, partial transfers and compression. If you’re interested, check out the man page.
Enabling Remote Login from the Command Line
If you’re setting up your Mac with scripts, you can enable Remote Login from the command line. On a terminal window, type:
sudo systemsetup -setremotelogin onIf you want to disable it, you can do so with:
sudo systemsetup -setremotelogin offChanging SSH server preferences
Sometimes, you may need to change the preferences for the SSH server. For example, you may want to run SSH on a different port to thwart attackers, or you may want to disable password authentication. Open up a terminal window and type in:
sudo nano /etc/ssh/sshd_configThis will open up the SSH server configuration file in the nano text editor:
Once you’re finished editing the file, press Ctrl + O to save the file. Then, press Ctrl + X to exit the editor.
Next, you should restart the server for your changes to take effect. In the terminal window, run these commands:
sudo launchctl unload /System/Library/LaunchDaemons/ssh.plist
sudo launchctl load -w /System/Library/LaunchDaemons/ssh.plist
Any existing SSH sessions will get terminated, so don’t restart the server if you’re working on something through SSH at the same time.
Conclusion
SSH is a pretty nifty thing to have on your system. Fortunately, macOS makes it a breeze to set up a SSH server, allowing you to control your Mac and transfer files.
If you have any questions, feel free to ask in the comments!