How to Run Android Apps on Your Computer With Android-x86
Android has turned out to be the most popular OS on mobile devices. However, desktop OSes such as Windows, Mac or Linux don’t support running Android apps natively. While there are emulators such as Bluestacks, they’re filled with ads and hogs your computer. In this article, we’re going to look at an alternative way of running Android apps on your computer — using Android-x86 and VirtualBox.
Step 1: The prerequisities
Before you begin, there’s a few things we need to do:
- Install VirtualBox
VirtualBox is a program that helps you to run different OSes on top of your existing OS, such Windows, Mac or Linux. Since Android-x86 is a full-blown OS, you should install VirtualBox so that you can use it alongside your existing OS.
So go ahead, download VirtualBox and install it on your computer.
- Download Android-x86
You can download an ISO file of Android-x86 here. It comes in both a 32-bit (x86) and a 64-bit(x86_64) variant. In this guide, we’re going to use the android-x86-6.0-r1.iso file, which is the latest 32-bit release.
Step 2: Setting up the virtual machine
Now, we will create a virtual machine(VM) inside VirtualBox. Open VirtualBox and click on the “New” icon. You’ll get a dialog box asking for the details of the VM. Give it a name (we’ll call ours “Android”), and use the following settings:
- Operating system type: Linux
- Operating system version: Linux 2.6/3.x/4.x (32-bit)
- Memory size: 1024 MB or more
- Hard disk: When you’re asked for hard disk settings, select “Create a virtual hard disk now” and opt for a “Dynamically allocated” hard disk file. Set the hard disk size to 10 GB or more.

At the end, you’ll find that a new VM named “Android” has been created.
Step 3: Installing Android-x86
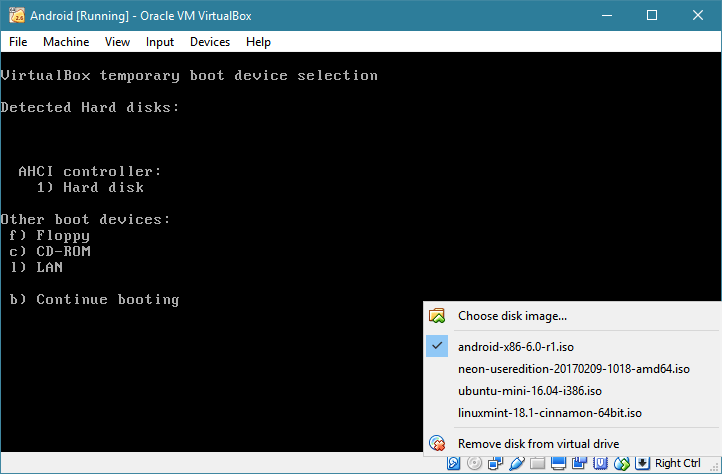
Power on the VM by double-clicking on it. You’ll be asked to add an ISO file to boot from. Here, you can select the Android-x86 ISO file you’ve downloaded.
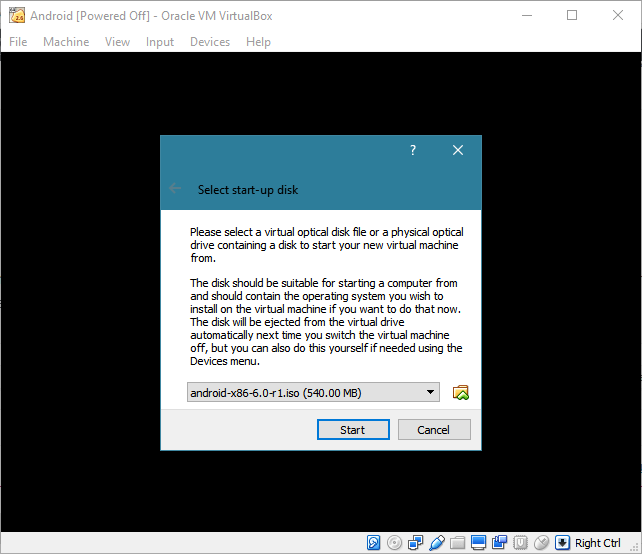
If this option doesn’t show up for you, hit F12 when the virtual machine starts to boot. Then, you can right click on the CD icon in the status bar to add an ISO file. Then, press the key shown on screen to boot from CD. (In our case, the key is “c”.)
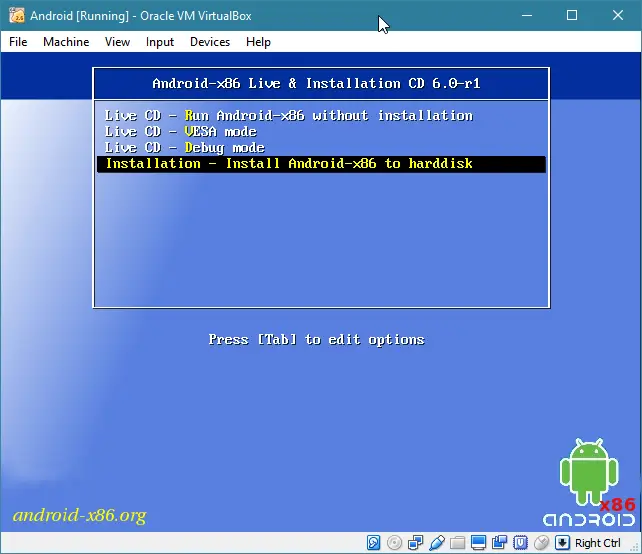
When the VM boots up, select the installation option with the up/down arrows and press Enter to continue.
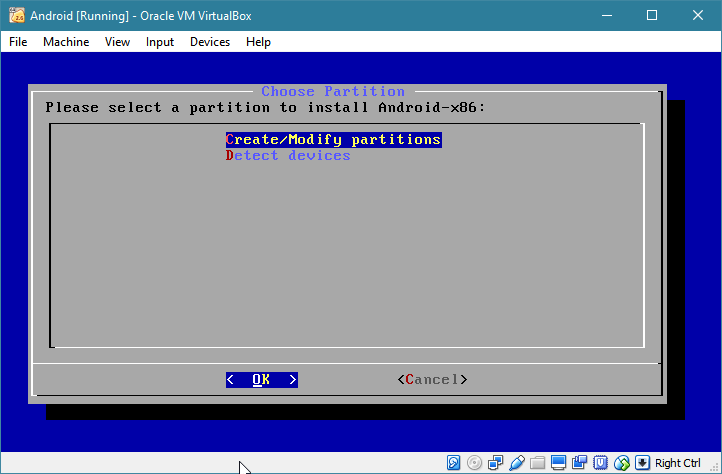
Now, you need to create a partition to install Android. Select the “Create/Modify Partitions” option. Then, select “No” to skip using GPT.
You’ll be taken to a text-based partition editing tool. Use the left/right arrow keys to select the “New” option, and hit Enter. Then, choose the “Primary” option and hit enter. You’ll be asked for the size of the partition. The default is fine, so hit Enter again.
Since we’ll be installing an OS to the partition, we have to mark it as bootable. Select the “Bootable” option and hit Enter. Finally, the partitioning scheme will look something like this:
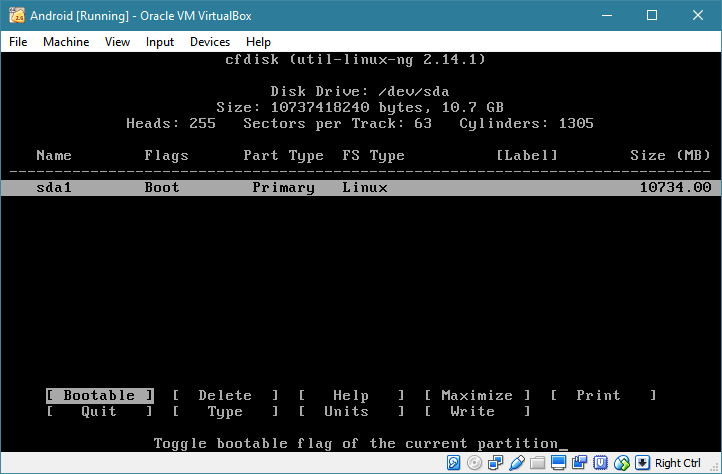
Select the “Write” option to save your changes. You’ll have to type in “yes” to confirm. Finally, you can quit the partition editor using “Quit”.
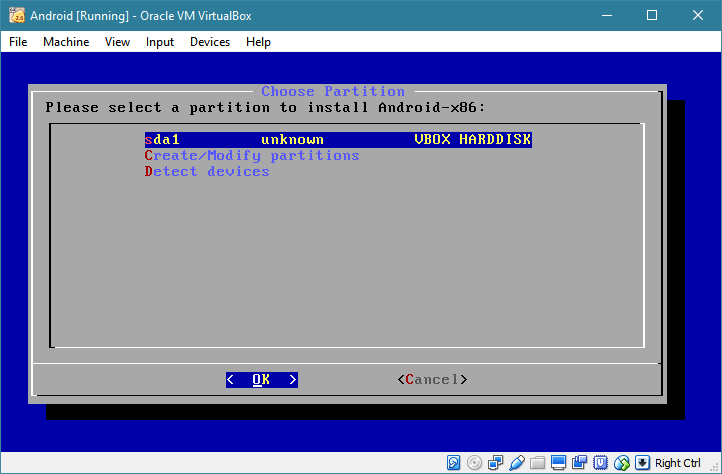
Now, you have to select the partition where Android-x86 should be installed. The default is fine, so you can press Enter.
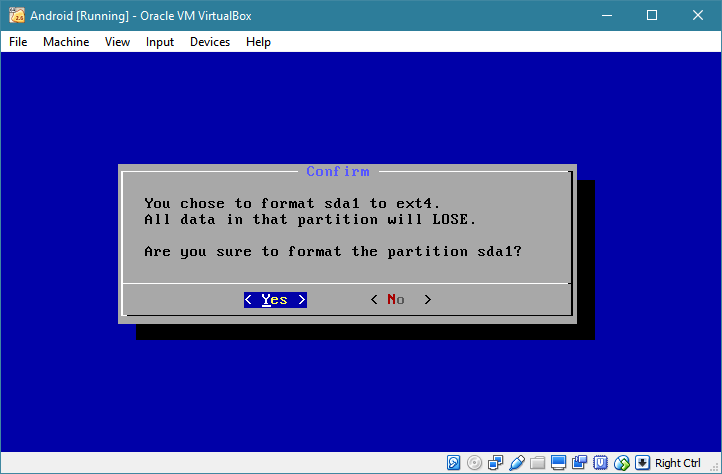
Select the “ext4” filesystem, and select “Yes” to format the disk.
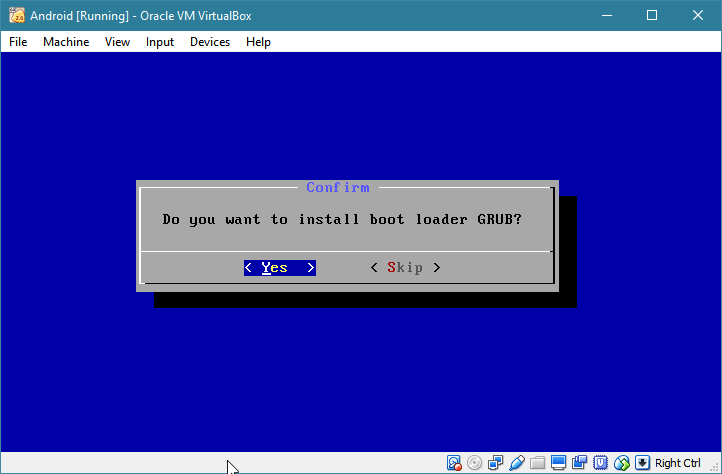
Select “Yes” to install the GRUB bootloader. Then, select “No” to skip installing the EFI version of GRUB as we won’t need it.
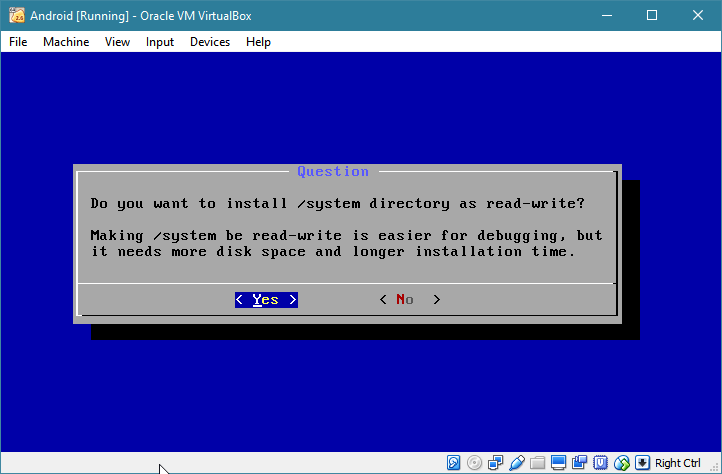
Then, select “Yes” to install the /system partition as read-write. This is very useful for trying out root-based apps.
It will take a few minutes for the installation to complete. When it’s done, right click the CD icon in the status bar and select “Remove disk from virtual drive”. Then, select “Reboot” and press Enter. If you don’t do this, you’ll end up booting from the ISO again, instead of the hard disk. (If you’ve already booted into the ISO again, simply press Right Ctrl + R to force a reboot.)
When the reboot completes, Android should ask you for the initial setup, just like a regular smartphone or tablet.
Step 4: The initial setup
You might find a few quirks while trying to set up Android. For example, when you try to click within the window, you’ll find that the mouse pointer doesn’t show up. To fix this, you can disable mouse integration from the “Input” menu.
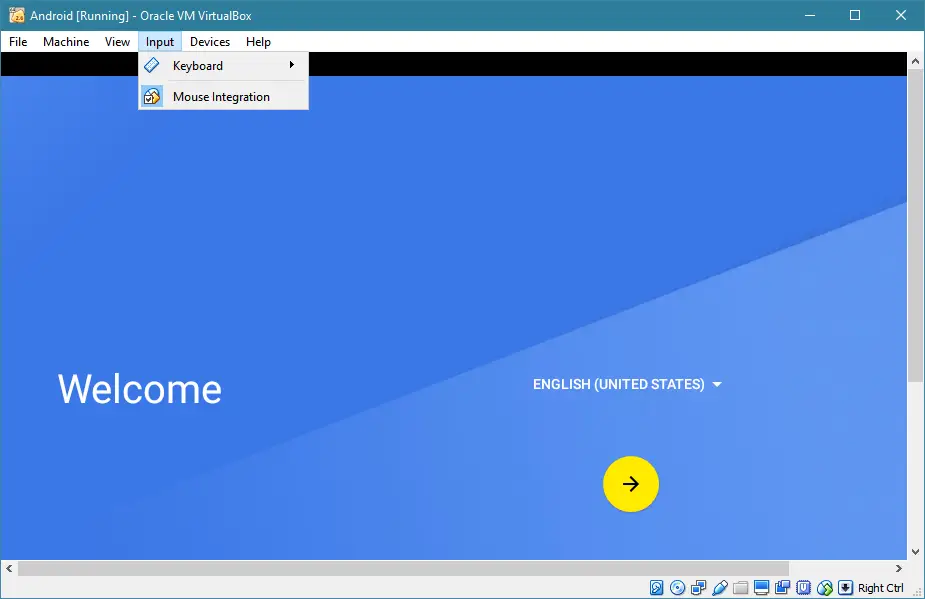
After you disable it, simply click once within the VirtualBox window to use the mouse. When you’re done, hit the Right Ctrl key to free the mouse pointer from the window.
If your screen is too small to fully show the Android screen, hit Right Ctrl + F to go full screen. You can exit from the full screen mode by pressing Right Ctrl + F again. If the full screen mode is not to your tastes, you can use the “Scaled Mode” by pressing Right Ctrl + C.
You can now complete the setup process by signing in to your Google account. During the setup process, you may get a warning saying that there’s no WiFi connection; you can ignore this safely.

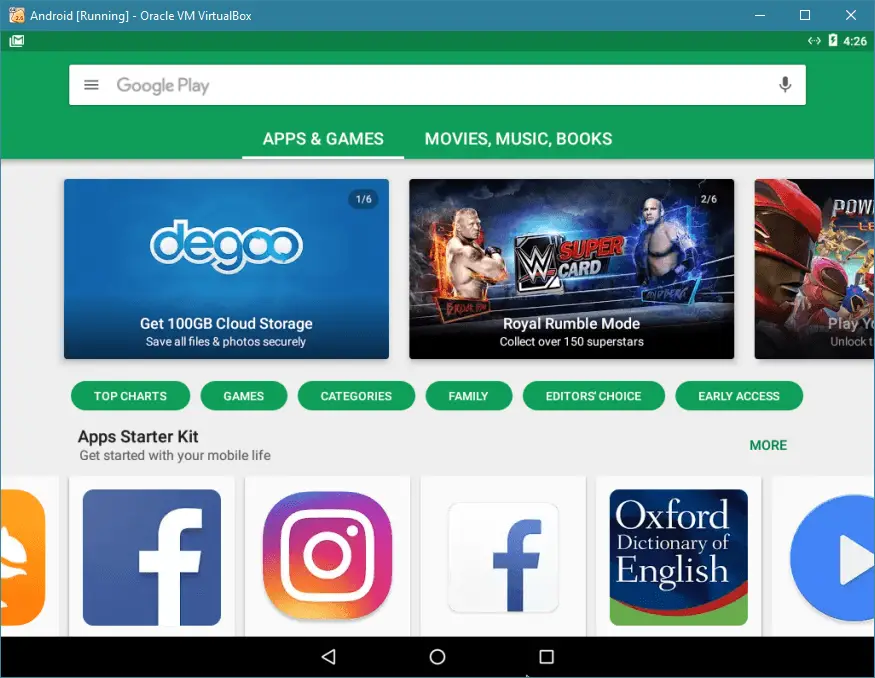
At the end of the process, you’ll be taken to the home screen.
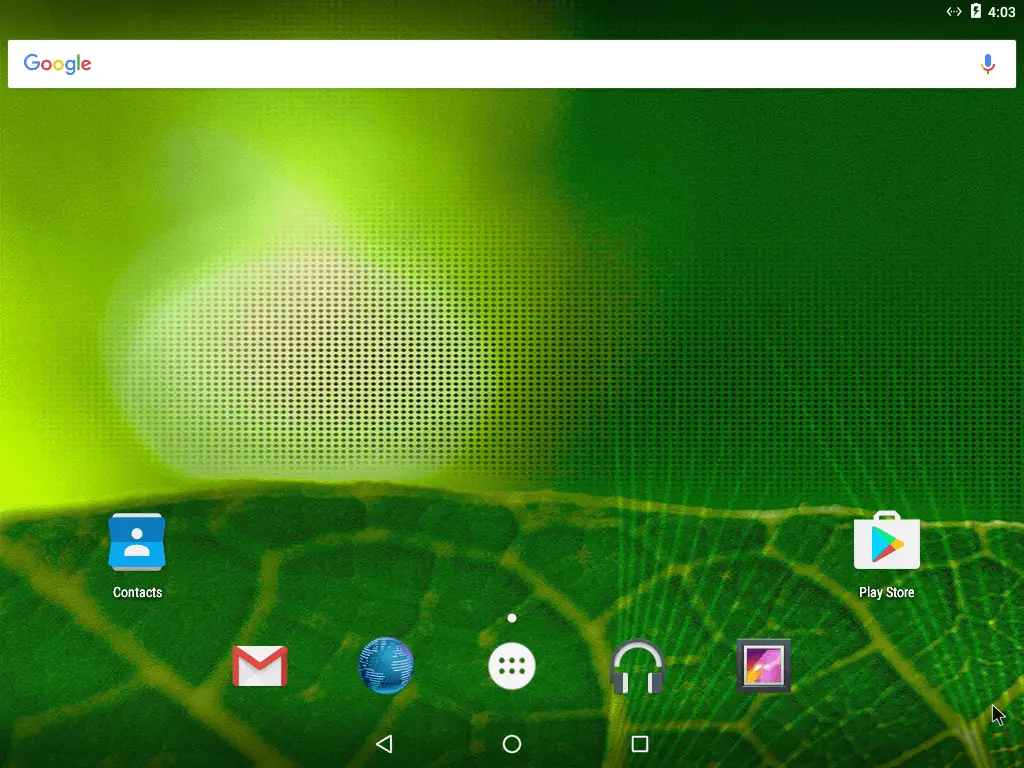
You can now install apps from the Play Store and surf the internet. While most applications work fine, there may be the occasional app which refuses to run inside Android-x86.
Conclusion
Using Android-x86 and VirtualBox is a great way to enjoy Android applications on your computer. Please leave a comment below to let us know of your results installing and running Android-x86!