Adding HTTPS to Your Site with Cloudflare
Much of the web works on HTTP; but it is insecure protocol as it provides no protection. It’s secure sibling, HTTPS provides protection against eavesdropping and tampering of data. Historically, HTTPS has been used for financial transactions and other situations involving transmitting highly sensitive information.
However, recently, there has been a push to move all websites to HTTPS; probably caused by egregious violations of privacy by ISPs and governments. In fact, Firefox and Chrome regard HTTP websites as insecure. Apart from the security benefits, Google uses HTTPS as a ranking signal. Thus, it has become very important for websites to use HTTPS.
In order to deploy HTTPS, you need a SSL certificate that’s signed by a Certification authority(CA). There are various CAs who can give you such certificates for free or for some amount of money. However, configuring HTTPS is often a pain. Instead, we’ll look at deploying HTTPS with a Content Delivery Network(CDN), Cloudflare. It is a very simple technique of adding HTTPS and it only takes a few minutes.
How Cloudflare’s HTTPS works
Simply put, Cloudflare manages all your DNS records by providing a nameserver. To use Cloudflare, you need to switch to Cloudflare’s nameservers instead of using the ones provided by your host. After setting it up, all traffic is sent to Cloudflare’s servers, and requests are proxied to your web server via Cloudflare. Similarly, the response is proxied from your server to Cloudflare’s servers, and then sent to the user. HTTPS connections are made between the user and Cloudflare’s server, and traffic is sent to your server in plain HTTP. Thus, it allows you to deploy HTTPS without the complexity of certificates.
As we mentioned in a previous article on CDNs, deploying Cloudflare will also help you reduce your server bandwidth usage and protecting it against attacks. Again, the protection is due to the proxying of requests we mentioned above.
The initial setup
Deploying HTTPS is easy with Cloudflare. If you don’t have an account, you should sign up first.
Now, log in to your account, and click on “Add site” link on top. This should bring up a web page like the one below:
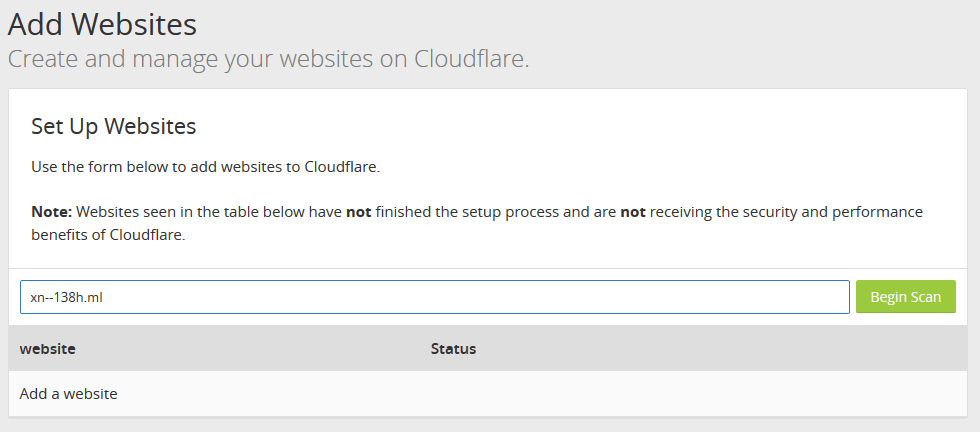
Type in your domain name below (without a prefix like “www.”) and hit the “Begin Scan” button. Cloudflare will now try to detect the DNS settings for your subdomain. Once the scan finishes, click on the “Continue Setup” button.

Now, you’ll get a list of all the subdomains and other DNS settings that had been configured. In our example, we’ve used a domain which already had various subdomains configured. If you’re using a domain name with no subdomains configured in it, you can add them in this step.
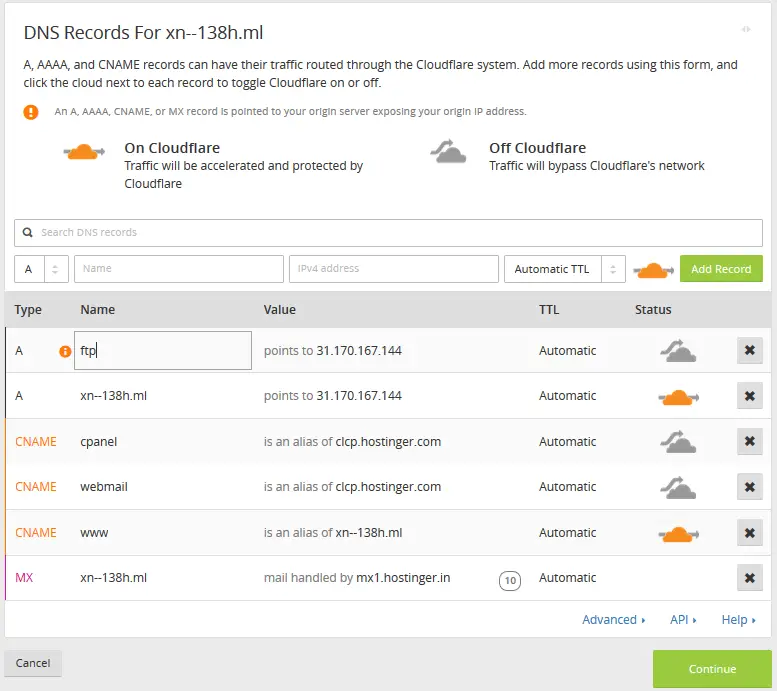
The DNS entries with a grey cloud icon are the ones which bypass Cloudflare’s network, whereas the ones with an orange cloud icon use Cloudflare’s network. At this point, if some web-related domains are not autodetected, click on the grey icon to make it orange. Keep in mind that Cloudflare can work for HTTP traffic only, so if you want to use protocols such as FTP or SSH, add DNS entries such as “ftp” or “direct” to the DNS configuration, by adding it through the form below. Be sure to click on the orange cloud icon to make it gray, otherwise direct access won’t be possible.

If there are some entries which point to such services (like the “ftp” server example above), be sure to leave them grey clouded.
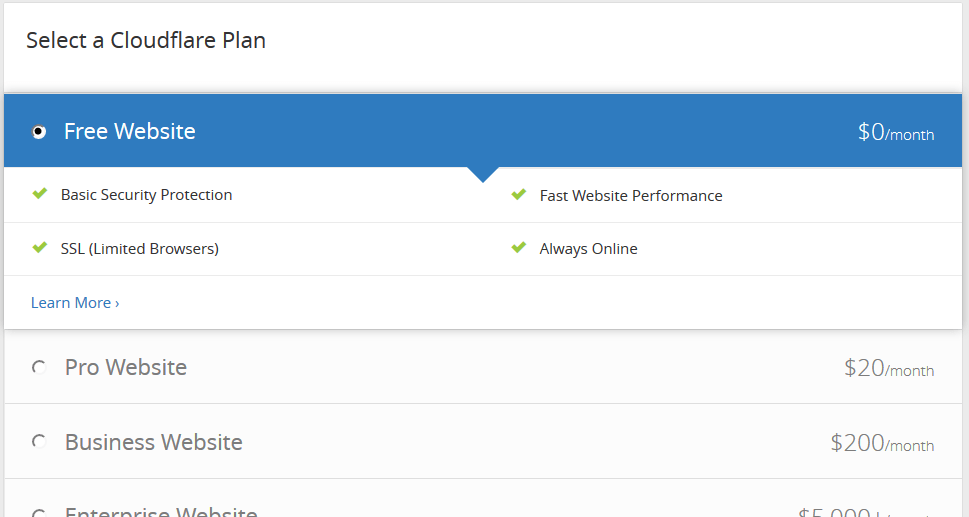
After setting up the DNS records, click on the green “Continue” button at the bottom of the page. You’ll be asked to select a Cloudflare plan. Select the free plan and click on “Continue”.
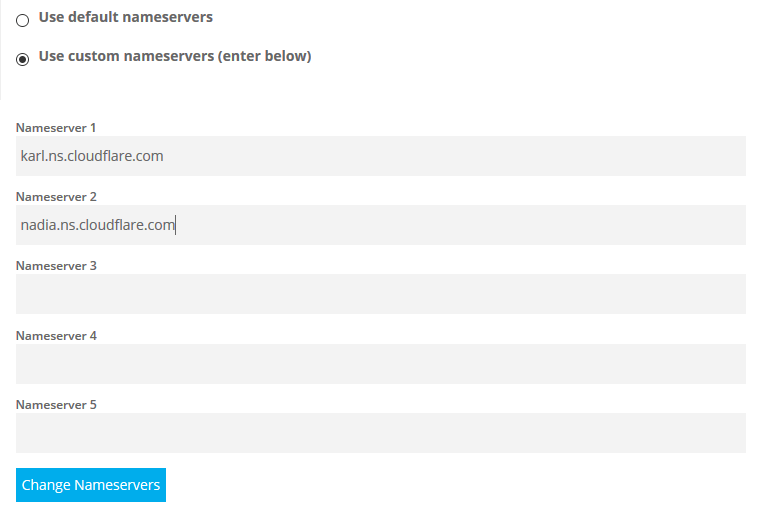
Now, you will be given a list of nameservers to use, like the example below:

Now, log in to your domain registrar’s control panel, and replace the existing nameservers with those provided by Cloudflare. The screenshot below is from the domain registrar we’ve used; it will look different for you depending upon who your domain registrar is.
Next, come back to the Cloudflare page and hit continue. You may get a warning like the one shown below. If this happens, then click on the “Recheck Nameservers” button.

As stated in the screenshot above, the process of traffic rolling over to the new nameservers may take some time (usually it takes around 10 minutes to 2-3 hours). This is because DNS records are cached by various DNS servers and it may take some time for the new DNS records to be propagated. During this time, your server will be accessible over HTTP but not with HTTPS. When the new nameservers come into effect, you will be able to access your site with HTTPS.
You can try opening https://<your_domain_name> to check if this process has already occured.
Fixing misconfigured server apps
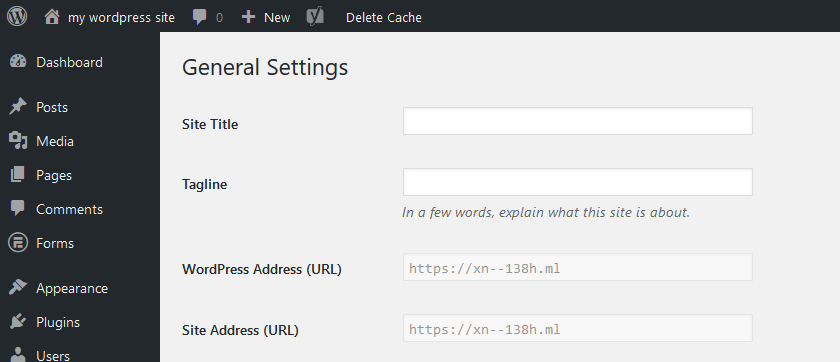
When you tried to open the HTTPS version of your website, you may have seen that some images and scripts refused to load. This is because the applications on the server have been configured to use HTTP, but you’re using HTTPS.
The instructions to fix this issue depend upon the web application you’re using. For example, if you’re using WordPress, you should first switch back to the HTTP version of the site in your browser. Then, you can log in Wordpress and change it from the “General Settings” panel. Here, you should set the site URL to use “https” instead of “http”.
For most other web applications, the process should be similar. In other cases, you might have to change a configuration file by hand by logging into your server.
Fixing mixed content warnings
In addition to configuring your web application, you may find some external scripts and images which are accessed over HTTP that break your website. If you have a lot of content on your website, fixing it one-by-one is not a feasible solution. You can use nginx’s nginx_substitutions_filter or Apache’s mod_substitute to rewrite all the HTTP URLs in a web page to HTTPS.
Redirecting to the HTTPS version of your website
Now that you’ve sorted out these issues, you should redirect users to the HTTPS version of your website. Otherwise, visitors would still get the HTTP version when they visit your site. Thus, your users won’t the security benefits of HTTPS.
Fortunately, in this case, you need not deal with redirection rules for your server — Cloudflare allows you to set up page rules to do this. Head over to the “Page Rules” tab and click on “Create Page Rule”. A dialog box like the one below should come up:
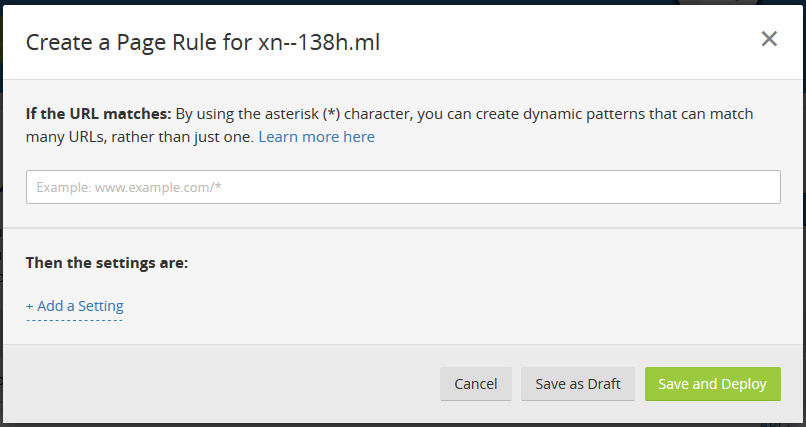
You can add an URL pattern like http://*<your_website_name>* (for example, in our case, http://*xn--138h.ml* to match all URLs that can be accessed. Next, click on “Add a Setting” and select “Always use HTTPS” from the dropdown menu. Finally, click “Save and Deploy” in order to enable these redirections.
Conclusion
HTTPS is of prime importance in a day where the internet is mostly a hostile place with attackers trying to tamper and eavesdrop on your connections. Services such as Cloudflare make the painful process of deploying HTTPS simpler and cost-effective.