A Guide to Using the Caddy Server on Linux

Caddy is a web server that’s extremely easy to configure and use. It provides HTTP/2 support, automatic SSL configuration with Let’s Encrypt, and an intuitive configuration syntax. It is cross-platform, and can run across all major operating systems, such as Linux, macOS and Windows.
In this article, we’re going to install Caddy on a Linux system and configure it to serve a website. These instructions should work on most popular distributions, and they were tested on Ubuntu 18.04/20.04, Debian 9/10, and CentOS 7/8.
[toc]
Prerequisites
First of all, we will assume that you have root access on your system through sudo. However, if you can log in to the system directly as the root user, then you can simply remove the sudo from the beginning of the command before executing it.
If you are logged in as a non-root user, but do not have root access through sudo, then you can use the su command to obtain a root shell. Then, you can remove the sudo from the beginning of the commands, as mentioned earlier.
In addition, before you follow this article to install Caddy, there are a few packages that you need to install — nss-tools, setcap, wget and tar.
On Debian/Ubuntu, use the following command to install these packages:
sudo apt update
sudo apt install libcap2-bin libnss3-tools wget tar
On CentOS, use the following command to install these packages:
sudo yum install libcap nss-tools wget tar
Installing the Caddy binary
Head over to the Caddy releases page, which offers binaries for a variety of process architectures. To determine the processor architecture for your system, run the following command:
uname -m
Most often, servers and desktop systems run on Intel 64-bit processors. The output of the above command on such systems would be x86_64, which is also known as “amd64”. Therefore, you should download the .tar.gz file for Linux amd64:
wget https://github.com/caddyserver/caddy/releases/download/v2.0.0/caddy_2.0.0_linux_amd64.tar.gz
ARM based systems such as the Raspberry Pi, the output of the uname -m command is armv6l or armv7l. You can also find .tar.gz files for both these architectures on the releases page, and download them as shown above.
Once you have downloaded the file, extract the caddy binary to the /usr/local/bin directory by running:
sudo tar -C /usr/local/bin/ -xf caddy_2.0.0_linux_amd64.tar.gz caddy
To confirm that the binary was installed, run the following command:
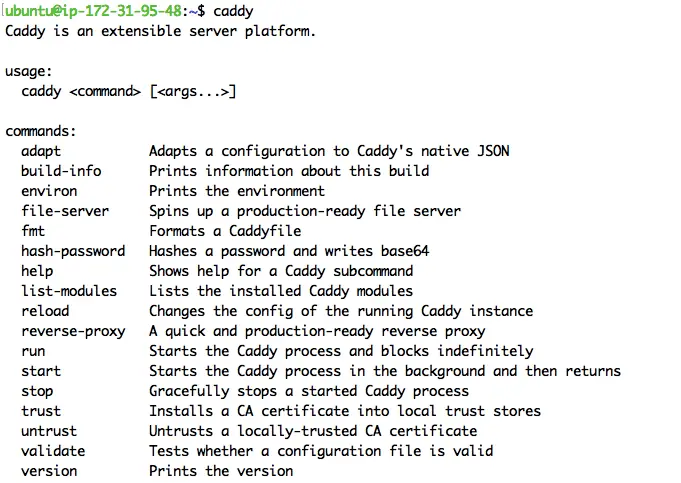
caddy
You should see Caddy’s help text, as shown in the screenshot below. If you see this text, this would indicate that the binary was installed successfully.
Setting up user accounts and directories
Web servers such as Caddy are exposed to the internet. It is a best practice to run any internet facing software as a restricted user.
Therefore, we’ll set up a restricted user named caddy with the home directory of /etc/caddy by running the following command:
sudo useradd --shell /bin/false --home-dir /etc/caddy --system caddy
Under the home directory, Caddy stores configuration under the .config directory, and certificates under the .local directory. So, run the following command to set up these two directories:
sudo mkdir -p /etc/caddy/.config /etc/caddy/.local
We’ll also need a directory in which we can tell Caddy to store access logs. For this purpose, we’ll create a directory /var/log/caddy with the following command:
sudo mkdir -p /var/log/caddy
Next, change the ownership of these directories to the caddy user:
sudo chown -R caddy: /etc/caddy /var/log/caddy
In addition, when you run software as a non-root user, Linux prohibits these processes from listening on to port numbers which are less than 1024. To bypass this restriction and run Caddy securely as a non-root user, add the cap_net_bind_service capability to the caddy binary:
sudo setcap cap_net_bind_service+ep /usr/local/bin/caddy
Auto-starting Caddy
Now that we’ve created the user and directories, we’ll set up Caddy as a system service. By doing this step, the Caddy web server will automatically start when you boot (or reboot) your system. You’ll also be able to start, stop, or force Caddy to reload its configuration by using the systemctl command. We’ll also define the working directory for Caddy through this file; which will set the default directory where Caddy will look for files to serve.
First, run the following command to determine the systemd version:
systemctl --version
This will list the version of systemd, as shown below:

Note down the systemd version, since you need to create a different file based on the systemd version.
Next, use your favourite text editor to create the file /etc/systemd/system/caddy.service. Most distributions have the vi editor installed, so you can run:
sudo vi /etc/systemd/system/caddy.service
In the vi editor, press i to enter the editing mode.
If the systemd version is greater than 229, paste or type in the following content into the editor:
[Unit]
Description=Caddy web server
After=network-online.target

[Service]
User=caddy
Group=caddy
Type=exec
WorkingDirectory=/var/caddy/html

ExecStart=/usr/local/bin/caddy run -config /etc/caddy/Caddyfile
ExecReload=/usr/local/bin/caddy reload -config /etc/caddy/Caddyfile
ExecStop=/usr/local/bin/caddy stop

LimitNOFILE=1048576
LimitNPROC=512

PrivateTmp=true
PrivateDevices=true
ProtectHome=true
ProtectSystem=strict
ReadWritePaths=/etc/caddy/.local /etc/caddy/.config /var/log

CapabilityBoundingSet=CAP_NET_BIND_SERVICE
AmbientCapabilities=CAP_NET_BIND_SERVICE
NoNewPrivileges=true

[Install]
WantedBy=multi-user.target
However, if the systemd version is less than 229, paste or type in the contents shown below. Since systemd versions less than 229 do not have the feature of adding security restrictions to the process at runtime, we’ve omitted those here.
[Unit]
Description=Caddy web server
After=network-online.target

[Service]
User=caddy
Group=caddy
Type=simple
WorkingDirectory=/var/caddy/html

ExecStart=/usr/local/bin/caddy run -config /etc/caddy/Caddyfile
ExecReload=/usr/local/bin/caddy reload -config /etc/caddy/Caddyfile
ExecStop=/usr/local/bin/caddy stop

LimitNOFILE=1048576
LimitNPROC=512

[Install]
WantedBy=multi-user.target
Exit the editing mode by pressing “Esc”, and then type :wq to save the file.
Configuring Caddy to serve a website
The final step in configuring Caddy is to set up a Caddyfile, which tells Caddy about what to do when a HTTP request arrives. To create the Caddyfile, use:
sudo vi /etc/caddy/Caddyfile
Now, enter the editing mode by pressing “i”, and then enter the following content:
http:// {
    encode gzip
    file_server
}
This will instruct Caddy to serve files present in its current working directory, and compress HTTP response bodies with the gzip algorithm. Now, what’s the working directory for Caddy? As we mentioned previously, we have set up the working directory when we created the service file, as you can see in the line WorkingDirectory=/var/caddy/html.
Now, after typing in the above contents in the Caddyfile, press “Esc” to exit the editing mode, and then type :wq to save it.
Then, we will create the /var/caddy/html directory and put an index.html file inside it. Run the following commands to do so:
sudo mkdir -p /var/caddy/html
sudo bash -c 'echo "<h1>Hello from Caddy web server</h1>" > /var/caddy/html/index.html'
After making these changes, run the following command to start Caddy:
sudo systemctl start caddy
Now, visit the URL http://<server ip address>/, replacing the <server ip address> with the server’s public IP address. You should see a page like this:

If you can see this web page, this means that your setup is working as expected. However, if you receive a connection error or a timeout when connecting to your website, it could indicate the server firewall is blocking traffic, or that Caddy was not configured properly.
To troubleshoot any Caddy configuration issues, you can run the following command to view errors:
sudo systemctl status caddy
Finally, you would also want to set up Caddy to automatically start when your system is restarted. Use this command to set the Caddy service for automatic reboots:
sudo systemctl enable caddy
Setting up a website with HTTPS
Now that you have a website up and running, you can configure Caddy to automatically add HTTPS to it.
To follow the steps in this section, you should have your own domain name. First, go to the DNS settings of your domain’s DNS provider. Create a subdomain, or edit the apex domain’s DNS entry so that it points to the IP address of the server.
After you have made the changes in DNS, edit the file /etc/caddy/Caddyfile so that the configuration looks like this instead:
{
    email <YOUR EMAIL ADDRESS HERE>
}

<YOUR DOMAIN NAME HERE> {
    encode gzip
    file_server
}
Make sure to replace the placeholders <YOUR EMAIL ADDRESS HERE> and <YOUR DOMAIN NAME HERE> with your email address and domain name respectively. There’s no need to specify the protocol “https://” when specifying the domain name. When you don’t specify a domain name, Caddy automatically obtains certificates. Then, it applies HTTPS to your website, and also sets up redirection from HTTP to HTTPS.
After making the above changes, reload the Caddy configuration by running:
sudo systemctl reload caddy
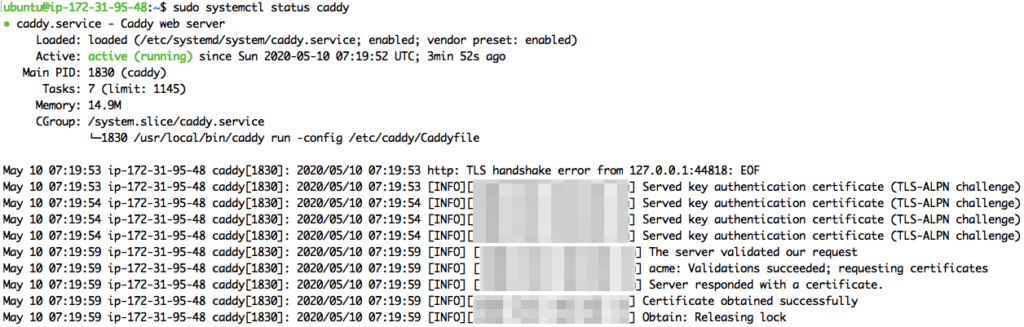
Wait for a few moments, and then run:
sudo systemctl status caddy
If all went well, the “status” command should show output stating that it’s obtained the certificates:
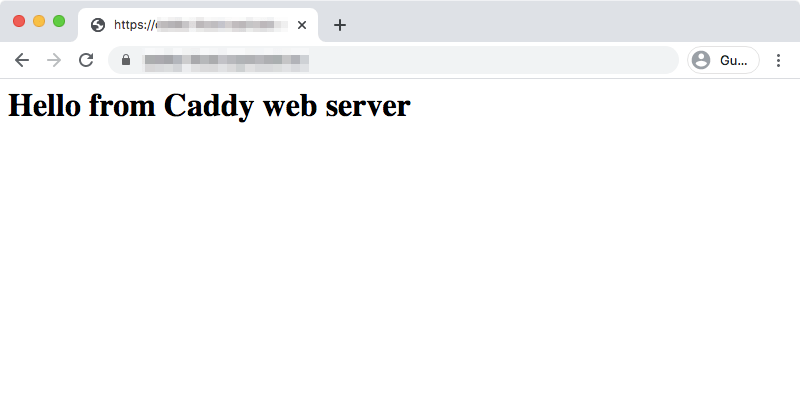
Now, using a browser, visit your domain name. The site will appear as HTTPS-protected, as shown below:
Hosting multiple websites (virtual hosting)
Often, you want to serve requests for multiple domains from the same server. This concept is sometimes known as “virtual hosting“. You can add additional blocks to your Caddyfile to perform virtual hosting.
As an example you have three domains, example1.com, example2.com and example3.com, where each domain would serve different content to the user. The first step is to create directories for these domains, such as /var/caddy/example1.com, /var/caddy/example2.com and /var/caddy/example3.com, and store the required files in these directories.
Once you have the content in place, edit your Caddyfile like so:
{
    email <YOUR EMAIL ADDRESS HERE>
}

example1.com {
    root * /var/caddy/example1.com
    encode gzip
    file_server
}

example2.com {
    root * /var/caddy/example2.com
    encode gzip
    file_server
}

example3.com {
    root * /var/caddy/example3.com
    encode gzip
    file_server
}
After making the above changes, reload the Caddy configuration by running:
sudo systemctl reload caddy
Caddy will set up HTTPS on these three domains and serve the content from the respective directories.
If, for some reason, you want that the sites should be HTTP-only, you can add a http:// before each site’s name, like so:
http://example1.com {
    # Caddyfile directives for example1.com
}
Logging requests
By default, Caddy does not log requests. However, you can configure Caddy to log details through the “log” directive. By default, Caddy stores its logs as lines of JSON, although other formats are available too.
As we’ve seen in the previous sections, the Caddyfile consists of sections in which you add the configuration for every website. To configure logging, edit the Caddyfile so that every block looks like this:
<YOUR DOMAIN NAME HERE, OR SPECIFY "http://"> {
    encode gzip
    file_server
    log {
        output file /var/log/caddy/access.log
    }
}
Once you’ve saved the Caddyfile, reload the configuration with:
sudo systemctl reload caddy
Now, visit the website in a browser, in order to generate a few log entries. Once you’ve done that, run the following command to view the logs:
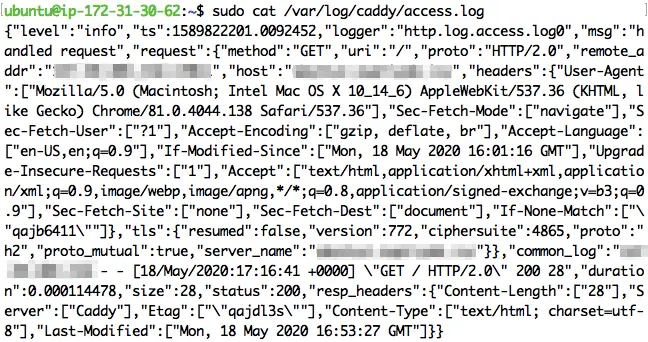
sudo cat /var/log/caddy/access.log
Here’s an example of how Caddy’s logs look like:
You can also configure “log rotation” with Caddy. When the size of your logs exceeds a certain threshold, Caddy moves the old log entries in a new file, and this is known as “rotation”. If the rotated log files stay there for extended period of time (that you specify), Caddy deletes the rotated logs.
By default, Caddy rotates log files when they reach 100 MB. The rotated log files are deleted after 90 days, or when there are more than 10 rotated logs. If you want to customize these parameters, you can do it like so:
log {
    output file /var/log/caddy/access.log {
        roll_size 10MB
        roll_keep 5
        roll_keep_for 240h
    }
}
In this example, the logs are rotated after they exceed the 10MB limit. These logs are deleted after 10 days (240 hours), or when there are more than 5 rotated logs.
You can also specify different log files for different websites, as shown below:
example1.com {
    # other Caddyfile directives
    log {
        output file /var/log/caddy/example1.log
    }
}

example1.com {
    # other Caddyfile directives
    log {
        output file /var/log/caddy/example1.log
    }
}
Conclusion
In this article, we took a brief overview of Caddy’s functionality and how to configure and use it on a Linux system. If you want to learn more, you should begin by reading about the Caddyfile.
A real website will also often use dynamic content in addition to static content. If you have a PHP based website, you should take a look at the “php_fastcgi” directive. On the other hand, if you have a web app written in a language like Go, NodeJS or Rust that starts up its own HTTP server, use the “proxy” directive.