How to Take Screenshots of Webpages from the Command Line
There are many situations where you might want to take screenshots of a webpage. Sure, there are browser extensions that do the job, but if you have to take screenshots of many web pages for archiving them, or generate them as part of an automated process, then you need a command line tool for the job. Here are four tools that generate web page screenshots from the command line.
pageres-cli
Although this is not as popular as some of the other, more well-known tools, pageres-cli is easily the best tool for generating screenshots. Based on PhantomJS, and written in Node.js, it renders even the most complex web pages accurately.
In order to install pageres-cli, you must first install Node.js and NPM. Then, open up a terminal window and install it like so:
sudo npm install -g pageres-cliHaving installed it, generating screenshots is easy as pie:
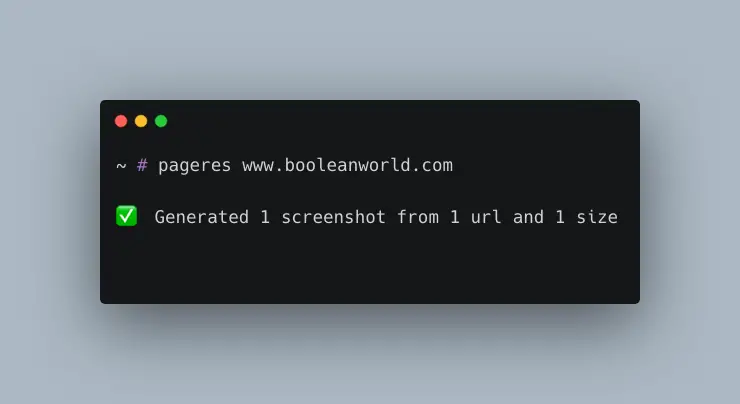
pageres google.comThis gives you a screenshot in your current working directory, named google.com-1366x768.png, which as you can tell, is in the resolution 1366x768 and in the PNG format.
You can specify your own filename, format and resolution. Consider the following command:
pageres google.com yahoo.com 1280x800 --format=jpg --filename="Pictures/<%= date %>_<%= url %>"That’s a long command, so let’s break it down for you:
google.comandyahoo.comare the URLs whose screenshots will be generated.1280x800specifies the screen size in which the screenshot will be rendered.--formatspecifies that the format that will be used. In this case we used the JPG format.--filenamespecifies the directory where the screenshots will be stored and the format in which files will be named. In our case, we have specified that they should go into the “Pictures” directory, and the filenames should contain the date, followed by an underscore (_), and further followed by the URL.
You can even specify different settings for different websites!
pageres [google.com 1280x800] [yahoo.com 800x600]Finally, you might notice some websites giving you “lite” or “mobile” versions of web pages while using this tool. You can simply change the user-agent string so that it resembles a modern browser:
pageres echo.opera.com --user-agent='Mozilla/5.0 (X11; Linux x86_64; rv:50.0) Gecko/20100101 Firefox/50.0'There are a variety of other options available; have a look at the project’s homepage.
Firefox
Firefox 57 and later versions features a command-line screenshot mode. Just like pageres-cli, Firefox captures webpages accurately, but it doesn’t have as many features. This mode doesn’t make use of a graphical environment, which makes it well-suited for usage on servers.
To take a screenshot with Firefox, run:
firefox -screenshot google.png google.comThis creates a full-page screenshot of google.com to the file google.png. At present, Firefox doesn’t support creating screenshots in other formats. If you use a different extension like google.jpg, it will create a PNG file with that name.
To take a size-limited screenshot, use the --window-size parameter. For example, if you want to generate a screenshot of size 1366x768, run:
firefox -screenshot google.png google.com --window-size=1366,768Addons installed in Firefox also affect the output; which is pretty useful in many cases. For example, if you install an ad blocking extension, this also removes ads in the screenshots.
cutycapt
While pageres-cli and Firefox are great, they are not to everyone’s tastes. Fortunately, there are other tools like cutycapt. It uses the QtWebkit library for rendering web pages.
On Ubuntu and Debian, you can install it with sudo apt install cutycapt; on other systems, you can compile it from source as described on their homepage.
You can take a screenshot with cutycapt like so:
cutycapt --url=google.com --out=google.pngcutycapt will try to detect the format of the output file from the filename. JPG, GIF, SVG and PNG formats are supported, among many others.
By default, cutycapt generates screenshots of the width 800x600. You can control the height and width of the screenshot, like so:
cutycapt --url=google.com --out=google.png --min-width=1366 --min-height=768This will give you a screenshot of the resolution 1366x768.
Have a look at the man page by typing in man cutycapt on the terminal to see a list of options.
If you are facing problems with websites serving you “lite” or “mobile” versions, specify an user-agent string resembling a modern browser:
cutycapt --url=... --out=... --user-agent='Mozilla/5.0 (X11; Linux x86_64; rv:50.0) Gecko/20100101 Firefox/50.0'However, if you are trying to run cutycapt on a computer with no running X server (like most servers), it will fail to run. You should use xvfb in order to run it:
xvfb-run --server-args="-screen 0, 1024x768x24" cutycapt --url=... --out=...In the above command, the --server-args parameter simply creates a virtual screen buffer of size 1024x768 with a 24-bit color depth. It does not affect the screenshot in any way.
wkhtmltoimage
wkhtmltoimage, which comes as part of wkhtmltopdf, is another tool to generate screenshots. Its feature set is oriented towards fast, automated generation of screenshots; although it is not the best if you want accurate ones.
It should be available in your distribution’s repositories. On Debian/Ubuntu, you can get it with sudo apt install wkhtmltopdf. If it is not available on your distribution, you can always get the precompiled binaries or compile it from source.
One word of caution though: if you are planning on running wkhtmltoimage on an environment without a X server, you should grab the precompiled binary — the ones in the default repositories often do not support running without it.
To install the precompiled binaries, download the latest archive for your system, and run:
sudo tar -xf wkhtmltox-*.tar.xz -C /opt
sudo mkdir -p /usr/local/lib /usr/local/share/man/man1
sudo ln -s /opt/wkhtmltox/bin/wkhtmltoimage /usr/local/lib
sudo ln -s /opt/wkhtmltox/bin/wkhtmltopdf /usr/local/lib
sudo ln -s /opt/wkhtmltox/share/man/man1/wkhtmltoimage.1.gz /usr/local/share/man/man1
sudo ln -s /opt/wkhtmltox/share/man/man1/wkhtmltopdf.1.gz /usr/local/share/man/man1
You can make screenshots of webpages by running:
wkhtmltoimage google.com google.jpgGenerating both JPG and PNG screenshots are supported. However, the sizes of the JPG files generated are huge
You can set a custom width and height by specifying:
wkhtmltoimage --height 1200 --width 800 google.com google.pngIn certain cases, the screenshot may have a greater width than what has been specified. You can fix this by adding the --disable-smart-width flag.
Unfortunately, there isn’t a reliable way to change the user-agent string. Specifically, you can change the User-Agent HTTP header, but there is no way you can change the navigator.userAgent value through JavaScript (JS). That being said, faking the HTTP header is all you need for many use cases. You can do that with:
wkhtmltoimage --custom-header-propagation --custom-header User-Agent 'Mozilla/5.0 (X11; Linux x86_64; rv:50.0) Gecko/20100101 Firefox/50.0' google.com google.jpgThe --custom-header-propagation switch ensures that the custom User-Agent HTTP header to fetch all resources, such as images, JS files and inline frame content.
Sometimes, while making automated screenshots, you might want to see how the page looks like without JS. You can do so by using the --disable-javascript switch:
wkhtmltoimage --disable-javascript google.com google.jpgIf you have many screenshots to generate, you might want to speed things up by reducing the time for which JS can execute. The default time is 200 milliseconds(ms), but you can reduce or increase it. For example, if you want to allow 45 ms for JS to execute, use:
wkhtmltoimage --javascript-delay 45 google.com google.jpgTo view the full range of options available, run wkhtmltoimage --extended-help.
Conclusion
In this article, we have seen how to take screenshots of webpages using a variety of tools — some of which are oriented towards accuracy, and others towards speed.