How to Install Grav CMS on Debian/Ubuntu

The Content Management System (CMS) market today is captured by the three giants — WordPress, Drupal, and Joomla with WordPress being the leader. Grav CMS is a new kid on the block featuring an entirely different principle. It is an open-source flat-file CMS with exciting functionalities. We will look at some of Grav’s features and then explain how to deploy it on a server running Debian or Ubuntu.
Grav CMS features
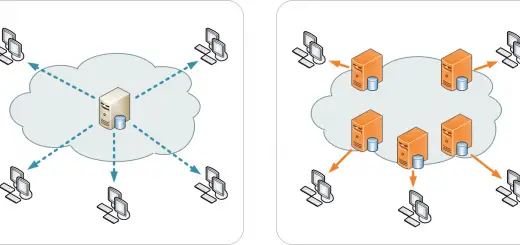
Grav offers some promising features, unlike other traditional CMS. The main selling point is that it is based on a flat-file based architecture which basically means is that it does not need any database system to work. In addition, there are many other features that make Grav stand out:
- Native markdown support: WYSIWYG editors are good but the HTML output that comes out of it is definitely not clean. Grav has native support for Markdown which makes it easier to write content in a better format.
- SEO Friendly: Grav provides clean URLs along with configuration files that can be used to set the global and per-page metadata.
- Debugging/Logging support: There is a visual debugging panel which can be used to log and identify errors easily.
- In built routing and redirection: You don’t have to mess around with the web server’s configuration to handle redirection and routing. There is a site configuration file in which you can specify the routes and redirects and it will handle the rest on its own.
- Version Control Support: You can use file storage services to sync and backup your data and also use version control systems like GIT or SVN.
- Native Retina image support: Grav provides native Retina images without the need to install any external plugins.
- Flexible CSS framework: You can use any CSS framework like Bootstrap, Materialize or Foundation.
- Awesome technologies: Grav uses the most modern coding standards and technologies like Twig for templating, Doctrine cache, Symfony framework modules, markdown, YAML and many others.
- Easy installation: The best part about a flat-file CMS is that there is no need to install anything and the dependencies are also minimal. You just need to place the Grav files at the webroot of your web server and it’s done. No configuration is required to get a site up and running.
Installation
The only requirement for installation is that you should have a web server like Nginx or Apache and PHP installed on your system. Some additional PHP modules are required. So, install them using the command below.
sudo apt update
sudo apt install php-fpm php-gd php-curl php-zip php-mbstring php-xml
Now download Grav core + admin ZIP file from the downloads page and extract the folder to the webroot of your server. Usually, the location is /var/www/html. We can do so by running:
wget <latest URL for Grav core + admin file> -O grav.zip
unzip grav.zip
sudo mv grav-admin/ /var/www/html/grav
Now, let’s fix the permissions to the webroot folder. Enter the commands below in your terminal:
sudo chown -R www-data: /var/www/html/grav/
Now, depending upon your web server you are using, use the instructions below to complete the installation.
Instructions for Apache
If you are using Apache, we need to enable some modules and permissions for Grav to run smoothly. We need the proxy and proxy_fcgi modules so that PHP scripts can work. Additionally, we also need the rewrite module for clean URLs to work.
sudo a2enmod proxy proxy_fcgi rewrite
Now we also need to enable the configuration file which allows Apache to talk with PHP-FPM. Now, this is dependent on the PHP version that you are using. If you have PHP 7.0 installed then the command will be:
sudo a2enconf php7.0-fpm
If you have any other version of PHP, then replace 7.0 with your version number. If that didn’t work either, try using php-fpm instead of php7.0-fpm in the command above.
After enabling the modules, restart Apache. On newer versions (such as Debian >= 8 and Ubuntu > 16.04), you can do so using:
sudo systemctl restart apache2
However, if you are using an old version, you should use:
sudo service apache2 restart
Now, open your browser and visit your site by typing in the IP address/domain name of your server in which you installed Grav. It should be http://<your_server_IP>/grav/. If the site loads up properly without any errors, skip to the next section.
If things didn’t work out…
Now if you get a error, it’s probably due to the fact that Apache is not able to read the .htaccess file provided by Grav and apply the rewrite rules. In order to solve this problem, we need to set AllowOverride to All in the Apache configuration file.
Open the configuration file at /etc/apache/apache2.conf in an editor and navigate to the <Directory /var/www> block and change AllowOverride from None to All. The block should look like this:
<Directory /var/www/>
Options Indexes FollowSymLinks
AllowOverride All
Require all granted
</Directory>
Save the file and restart Apache in the same way we have done earlier.
Instructions for Nginx
If you’re using Nginx, we need to add some rules to configure it. Open /etc/nginx/sites-enabled/default with a text editor.
Here, you’ll find a line in the server block that contains index directive. It tells Nginx to serve a default file when an user navigates to a directory. We will add index.php to this list, like so:
server {
 index index.php index.html index.htm index.nginx-debian.html;
}
Then, we need to add in the following directives to the server block so that Grav works properly. If you want to change the path of your Grav installation later, simply replace all instances of /grav with the appropriate directory.
location /grav {
	try_files $uri $uri/ /grav/index.php?_url=$uri&$query_string;
}

location ~* ^/grav/(\.git|cache|bin|logs|backup|tests)/.*$ {
	return 403;
}

location ~* ^/grav/(\.git|cache|bin|logs|backup|tests)/.*$ {
	return 403;
}

location ~* ^/grav/(system|vendor)/.*\.(txt|xml|md|html|yaml|yml|php|pl|py|cgi|twig|sh|bat)$ {
	return 403;
}

location ~* ^/grav/user/.*\.(txt|md|yaml|yml|php|pl|py|cgi|twig|sh|bat)$ {
	return 403;
}

location ~ ^/grav/(LICENSE\.txt|composer\.lock|composer\.json|nginx\.conf|web\.config|htaccess\.txt|\.htaccess) {
	return 403;
}
Now, we’ll tell how Nginx should handle PHP files. Again, we will add this block within the server block. Depending upon the version of your distribution, you may need to change the value of fastcgi_pass. For example, if you’re using PHP 7.1, you have to change it to /run/php/php7.1-fpm.sock. However, if you’re using PHP5, you should change it to /var/run/php5-fpm.sock.
location ~ \.php$ {
	fastcgi_pass unix:/run/php/php7.0-fpm.sock;

	fastcgi_split_path_info ^(.+\.php)(/.+)$;
	fastcgi_index index.php;
	include fastcgi_params;
	fastcgi_param SCRIPT_FILENAME $document_root/$fastcgi_script_name;
}
Finally, we’ll restart Nginx in the same way as we did for PHP-FPM:
sudo systemctl restart nginx
sudo service nginx restart
Setting up the admin account
After you have performed all the above steps successfully, open your browser and head over to http://<your_server_IP>/grav/. You will see the following page.
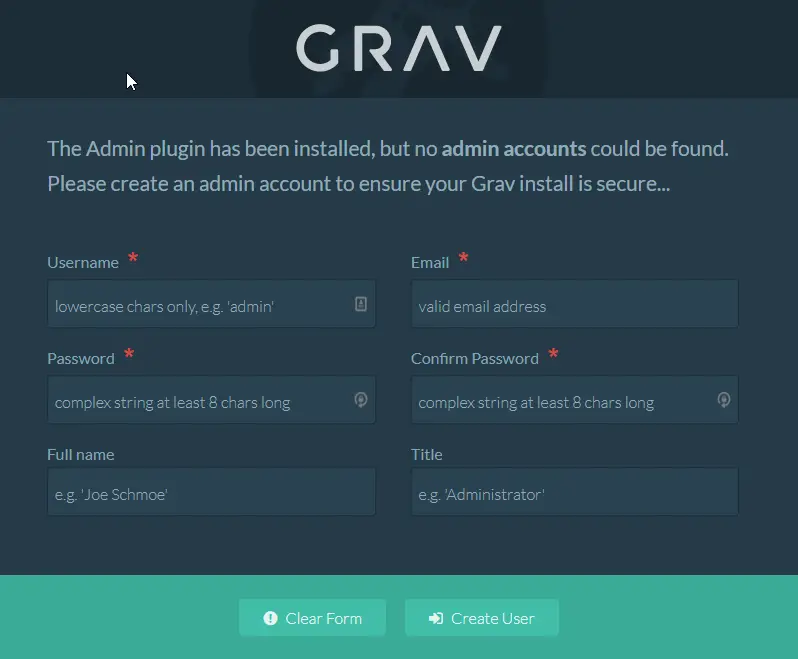
Since we installed the Grav + Admin plugin version, we need to create an account to access the admin dashboard. Fill in all the details and click on “Create User” button. You will be presented with the admin dashboard.
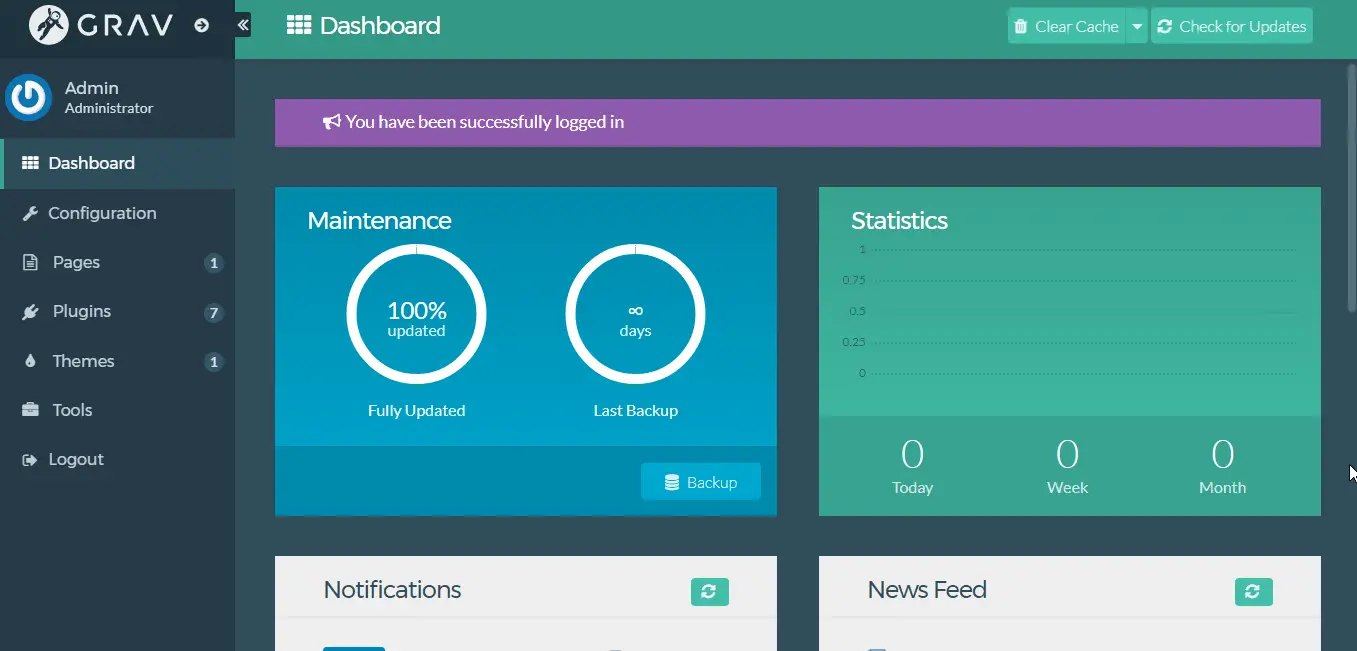
You can now create articles, install plugins and themes, and change the settings to customize Grav according to your needs.
Conclusion
Grav is a beautiful, fast and modern CMS that has the capabilities to compete with the likes of WordPress, Drupal or Joomla. In this article, we saw how to install and configure Grav in your server. You can read more about customization options and workflow at the official documentation. Do give Grav a shot and tell us what you think about it.