How to Download Files and Web Pages with Wget

The wget command allows you to download files over the HTTP, HTTPS and FTP protocols. It is a powerful tool that allows you to download files in the background, crawl websites, and resume interrupted downloads. Wget also features a number of options which allow you to download files over extremely bad network conditions.
In this article, we will learn how to use wget to achieve common downloading tasks from the command line.
Installing wget
Linux
Most Linux distributions have wget installed by default. To check whether it is installed on your system or not, type wget on your terminal and press enter. If it is not installed, it will display “command not found” error. Use the respective commands below to install it on your system.
For Ubuntu/Debian based systems use:
sudo apt update
sudo apt install wget
For CentOS/RHEL systems, use:
sudo yum install wgetMacOS
wget is available as a Homebrew package, so head over to the Homebrew page and follow the instructions to install it. Once you have done so, you can install wget with:
brew install wgetWindows
wget comes as part of msys2, a project that aims to provide a set of Unix-like command line tools. Go to the msys2 homepage and follow the instructions on the page to install it. Then, open a msys2 window and type in:
pacman -S wgetNow, you can access the wget command through the MSYS2 shell.
Downloading a file with its URL
If you have the link for a particular file, you can download it with wget by simply providing the URL as its parameter, like so:
wget http://releases.ubuntu.com/18.04/ubuntu-18.04-desktop-amd64.isoIf you run the above command, it will display progress information, such as the current download speed and how much of the file was downloaded:
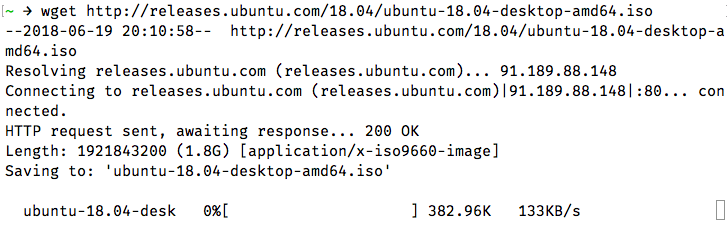
wget infers a file name from the last part of the URL, and it downloads into your current directory. So, in our example, the file will be saved to ubuntu-18.04-desktop-amd64.iso.
If there are multiple files, you can specify them one after the other:
wget <url_1> <url_2>Note that wget works only if the file is directly accessible with the URL. Occasionally, you will come across files that you can’t download directly with a link — such as a file which can be accessed after logging in. There are ways in which you can get around these restrictions, which we’ve discussed later in this article.
Downloading files over FTP
Wget works in the same way for FTP — you provide the FTP URL as an argument, like so:
wget ftp://ftp.example.com/ubuntu/ubuntu-18.04-desktop-amd64.isoSometimes, a FTP file may be protected with an username and a password. You can pass them onto wget like so:
wget --ftp-user=booleanworld --ftp-password=passw0rd <ftp_url>Customizing the output file name and directory
As we’ve seen previously, wget infers file names and it downloads to your current directory. If you want to save the file to a different directory or under a different name, you can use the -O switch. For example, if you want to save the download to a file Ubuntu.iso, run:
wget <url> -O Ubuntu.isoYou can also change the directory in this way. For example, to save the download as a file Ubuntu.iso under /media/sdb1/Software, run:
wget <url> -O /media/sdb1/Software/Ubuntu.isoSometimes, you may want to specify a directory, but let wget figure out the file name. You can do so by using the -P switch. If you want to save a file under the /media/sdb1/Software directory, use:
wget <url> -P /media/sdb1/SoftwareResuming interrupted downloads
A download may be interrupted due to bad network conditions, or because you’ve interrupted them manually by pressing Ctrl+C while wget was still downloading a file. You can resume an interrupted download with wget’s -c switch:
wget -c <url>If you’ve downloaded to a custom directory or file, you should combine the -c and the -P/ -O switches, like so:
wget -c <url> -O <path_to_downloaded_file>If you’re using -O and -c, be sure to provide the correct URL. Otherwise, you’ll end up with a partial combination of two different files, rendering it unusable. In addition, some servers don’t allow you to resume file downloads. (You can tell if a server supports resuming by looking at the progress bar. If, during the initial download, the progress bar moves back and forth instead of left to right, the server doesn’t allow resuming.) In that case, the file will be downloaded afresh from the beginning.
Throttling download speeds
If you’re downloading a big file, you may want to control the download speed so that you have additional bandwidth left for browsing the web. You can do this with the --limit-rate switch. For example, to limit the download speed to 512 KB/s, use:
wget <url> --limit-rate=512kSimilarly, you can use the m suffix for a limit in MB/s.
Downloading files in the background
By default, wget downloads files in the foreground, which might not be suitable in every situation. As an example, you may want to download a file on your server via SSH. However, you don’t want to keep a SSH connection open and wait for the file to download. To download files in the background, you can use the -b option like so:
wget -b <url>When you run this command, wget will tell you where it’s going to save a download log. This file is typically named wget-log, wget-log.1 or similar:

Later, if you want to monitor the status of the download, you can do so with:
tail -f wget-logThis will show you the last few lines of the download status:
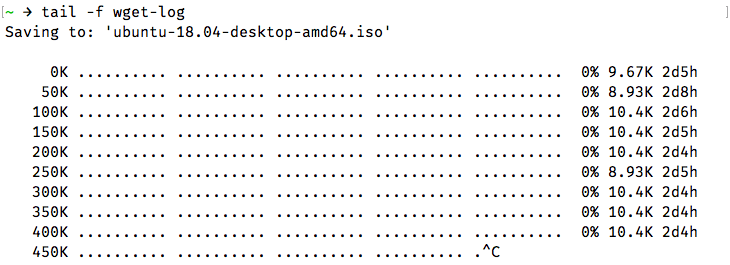
You can press Ctrl+C any time to stop viewing the progress. However, the download progress will continue in the background as usual.
Downloading files over bad network connections
If you are on a patchy internet connection, downloads can often fail, or happen at very slow rates. By default, wget retries a download for up to 20 times in case problems arise. However, on particularly bad internet connections, this might not be enough. If you notice slow download rates with frequent errors, you can run:
wget -t inf --waitretry=3 --timeout=10 --retry-connrefused <url>First, we’ve set the number of tries (the -t switch) to inf. Should wget face problems downloading the file, it will try infinitely many times as needed to complete the download. Then, we’ve used --waitretry to set the delay between each retry to 3 seconds.
Next, we’ve set the network timeout to 10 seconds with the --timeout switch. In case wget doesn’t hear back from the server for more than 10 seconds, it assumes that the connection is down. Doing this helps wget reissue network requests to fetch the file.
Finally, we’ve used the --retry-connrefused switch. Typically, a “connection refused” error occurs when the server is not running. However, it can also occur on unreliable network connections, and this switch tells wget to retry downloading in case it gets a connection refused error.
Downloading files recursively
So far, we’ve seen how to download particular files with wget. Sometimes, it is more useful to download related parts of a website. Wget has a “recursive downloading” feature for this purpose. In this mode, wget downloads the initial file, saves it, and scans it for links. Then, it downloads each of these links, saves these files, and extracts links out of them. By default, this process continues for up to five times. However, you can increase or decrease this limit (called “recursion depth”), as per your needs.
For example, to download the pages of the English Wikipedia recursively, use:
wget -r https://en.wikipedia.org/These files will be saved in a directory with the site’s name. In our case, the contents would be saved to a directory named en.wikipedia.org.
To control the “recursion depth”, use the -l flag. If you want it to set it to a custom value, such as 7 use:
wget -r -l 7 https://en.wikipedia.org/You can also use inf in place of a number. This makes wget retrieve all content of a website, with an infinite recursion depth.
By default, wget downloads all files that it finds in recursive mode. If you’re interested only in certain types of files, you can control this with the -A (accept) options. For example, if you want to download PNG and JPEG images from Wikipedia, use:
wget -r https://en.wikipedia.org/ -A png,jpg,jpegThis will download all files from Wikipedia (upto 5 levels), but remove any files that don’t end in the extensions png, jpg or jpeg. Similarly, you can also reject certain files with the -R switch. For example, to save all files from Wikipedia except for PDF documents, use:
wget -r https://en.wikipedia.org/ -R pdfConverting links in downloaded files
When recursively downloading files, wget downloads the files and saves them as-is. The downloaded webpages will still have links pointing to the website, which means you cannot use this copy for offline use. Fortunately, wget has a link conversion feature — it converts the links in a web page to local links. To use this feature, use the -k switch like so:
wget -k -r https://en.wikipedia.org/Setting headers and user-agent strings
HTTP clients (such as browsers and tools like wget) send a “user-agent string” as part of HTTP headers, that identify the client. Many webmasters block wget by configuring their server to block requests containing “wget” in this string. To get around this, you can override wget’s user agent string with a custom one; such as the one used by your browser. To find out your browser’s user agent, go to a site such as echo.opera.com. Copy the user agent from the page, and run wget with the -U switch:
wget <url> -U "<user-agent-string>"For example, if you were using a Mac, the command would look something like this:
wget <url> -U "Mozilla/5.0 (Macintosh; Intel Mac OS X 10_13_4) AppleWebKit/537.36 (KHTML, like Gecko) Chrome/66.0.3359.181 Safari/537.36"If you are a developer testing out your website’s functionality, you may need to tell wget to pass other HTTP headers. You can do so with the --header switch. For example, to send out the X-Foo header with the value of 123, run the following command:
wget <url> --header "X-Foo: 123"If you want to set multiple custom headers, you can repeat the --header switch as many times as necessary.
Downloading protected files
So far, the examples we’ve seen cover downloading publicly available files. However, there are times when you need to download files from a login protected page. In these situations, you can use a browser extension like CurlWget (Chrome) or cliget (Firefox). When you try to download a file, these extensions will generate a complete wget command that you can use to download the file. In this article, we will only discuss CurlWget, although cliget works in a similar way.
Once you’ve installed CurlWget on Chrome, head over to the extension settings and change the Tool option from “curl” to “wget”. Then, head over to Download settings (Three dot menu > Settings > Advanced) and select the option “Ask where to save each file before downloading”.
Next, try to download a file from within Chrome. Dismiss the dialog box asking for the download location, and click on the CurlWget icon on the toolbar. This will give you a wget command, with user-agent, cookie and other headers set, as shown below:
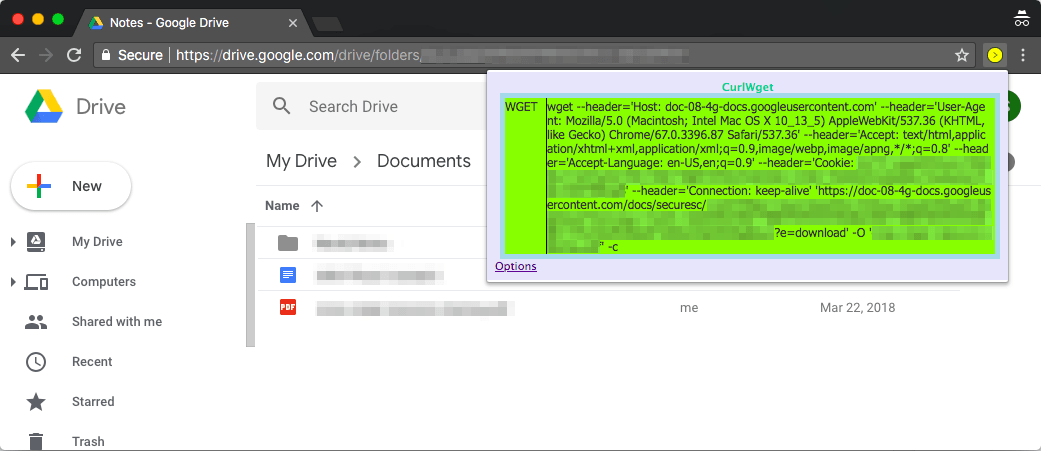
Now, you can copy this command and paste it in a terminal window to download the file. This is extremely useful for situations where you need to download a login protected file to a headless server.
Wget “spider” mode
Wget has a “web spider” feature, that fetches pages but does not save them. This is useful in case you have to check for broken links on a website. To use this option properly, you need to also enable “recursive downloading”, which allows wget to scan through the document and look for links to traverse.
If you want to scan https://example.com/, run:
wget --spider -r https://example.com/After wget has retrieved all the links, it will show any broken links, as shown:

You can also save this log to a file with the -o option:
wget --spider -r https://example.com -o wget.logLater, you can use grep to search the log for particular status codes or files. For example, to find any 301 redirects on your site, you can use:
grep -B 301 wget.log